


Our DIY weather station is live
In my diploma presentation I wrote that I’m going to build a weather station. Here is the path towards it.
What and Why
Windprofile
In order to determine whether or not a wind turbine is feasible a wind profile is a must. The closest weather station is near to Hämeenlinna, which is about 30 km south to Laitikkala. Since I noticed over the past years that we have a local wind profile different from the data from Hauho / Hämeenlinna I thought of a possibility how to get the wind profile done. The easiest way from my point of view is an anemometer, which tracks wind speed and direction over the whole year.
UVA / UVB
UVA and UVB play a role in skin cancer. With a sensor which can read both I can determine the amount of sun blocker necessary – or what I have to wear or to stay inside.
Temperature and Humdity
Inside the house and greenhouse I have some temperature sensor but I don’t have one outside. It would be nice to log temperature over time, therefore I need a thermometer.
Relative humidity would be interesting. I have some humidity sensors in different rooms but none outside. Would be nice to see the difference between in- and outside, especially in winter.
Barometric pressure
What would a weather station be without a barometer? Changes in barometric pressure is often an indication of a weather change. Low pressure means that the warm moist air is raising, getting colder and clouds form. High pressure means that the air gets compacted closer to the ground and temperature raises.
Rain gauge
Another interesting measure would be the amount of rain. Lumia noticed that a lot of rain passes above and below Laitikkala while Hämeenlinna is within the rain band. With a rain gauge we could get the local rain patterns.
Data logging
Besides having different sensors the logging makes the difference. I can log data for years and see the change.
What else?
Besides the bare minimum I’d like to see if I can get those things on my list done as well:
- VOC – volatile compounds – showing the air quality
- LUX – a sensor that can show how much light is available
- OTA – over the air updates – means uploading new code from remote
- Network settings UI – instead of hard-coding the SSID and password I could use a WIFI management library
- MQTT settings UI – it would be nicer if settings can be put into an UI and configured from there instead of hard-coded
Why DIY?
I know that there are a lot of ready made systems around. But the problem is: they usually don’t allow to access the data in a format I like. I also don’t like what I can not repair. Besides – decoding the proprietary data stream would need a lot of research – which I better invest in get better in coding C and soldering or other useful knowledge. Also a bought system can’t be easily extended. In my own system I could just add another sensor and / or change the code.
At the end my system will cost me the same as a bought one but with a DIY system I have build up knowledge and skills.
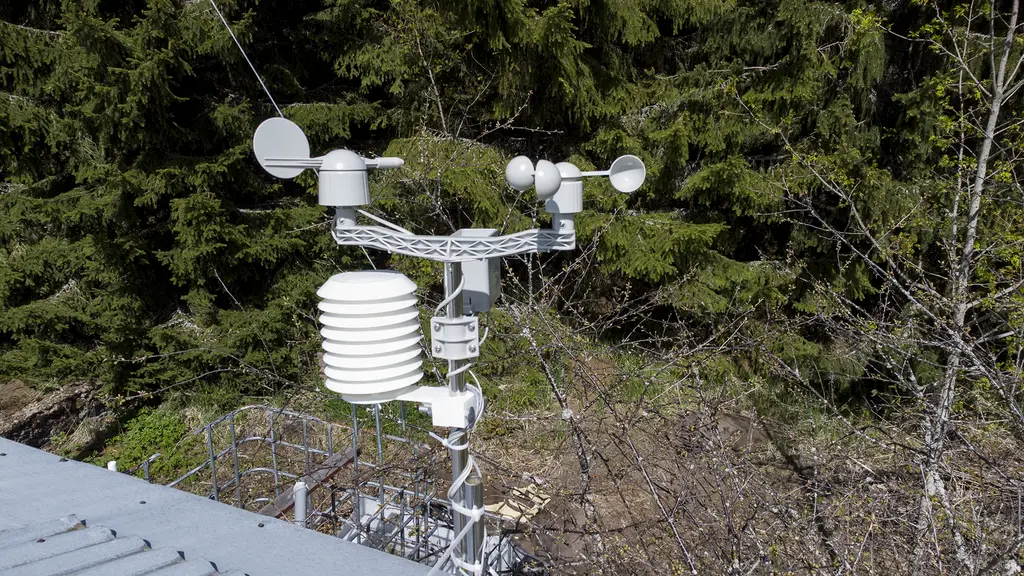
The details
Find below the list of parts that I used while building the station.
- AM2035 – Temperature and Humidity – encapsulated against rain
- BMP280 – Barometric pressure and temperature – Standard sensor from Bosch
- VEML6075 – UVA and UVB sensor from Adafruit
- Weather man anemometer and rain gauge from Sparkfun
- 3d-printed weather shield – files from Thingiverse
- Transparent box for the UV sensor & microcontroler
- Wemos D1 – ESP8266
- Soldering parts
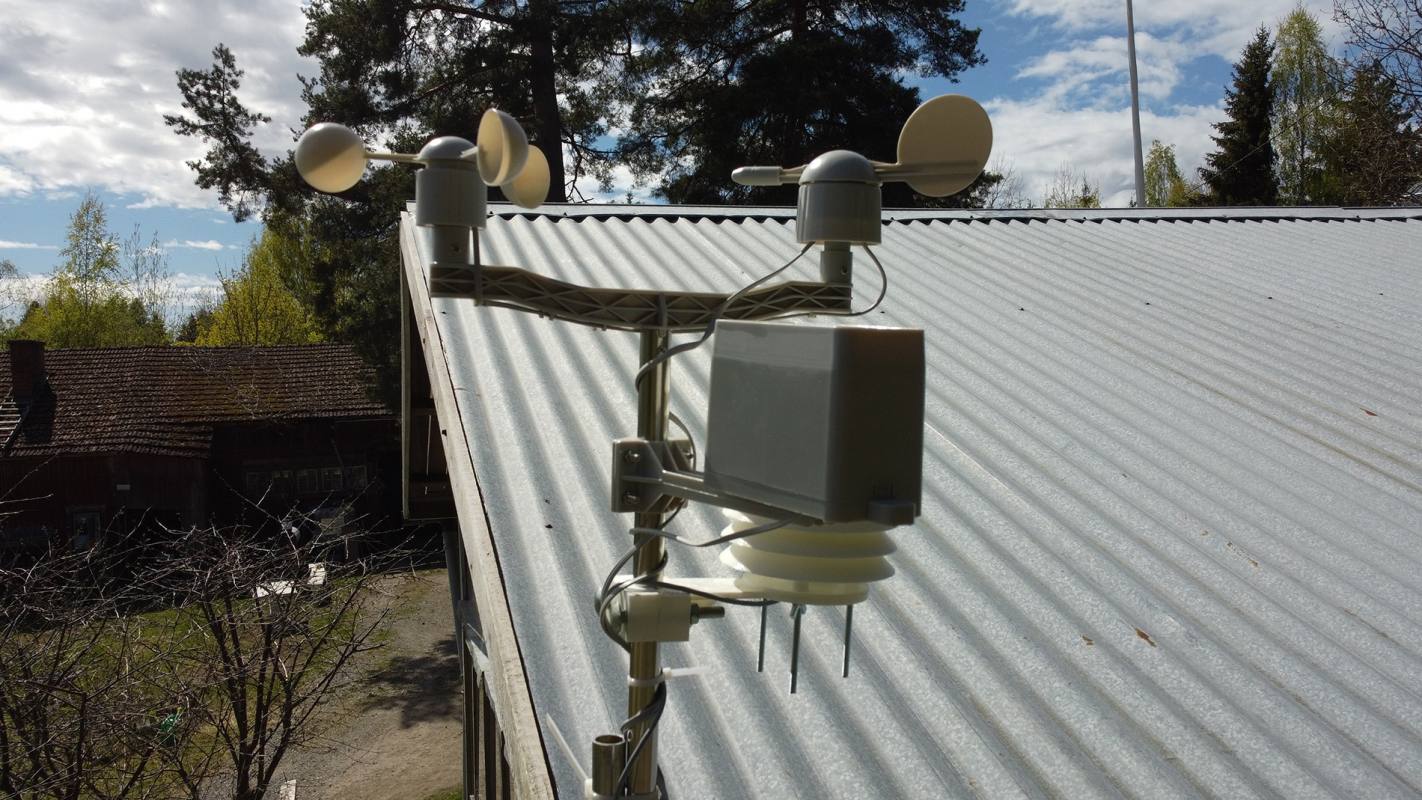
Getting it done
It took me a little more than a weekend to solder the system, get the code ready and test-run the whole system with the logging server. For data logging I’m using Homeassistant.
I had to come up with a solder board that allows to connect the anemometer, the rain gauge the AM2035 and everything else on the I2C bus. Since sensors on the I2C have their own address multiple sensors can be hooked on one line. The VEML6075 UV and the VEML7700 LUX sensor unfortunately share the same address, which means that only one of them can be hooked up. I decided to go with the UVA/UVB VEML6075 sensor.
Anemometer and rain gauge come with RJ45 jacks, which are useless for me since I don’t have the sockets for it. I just cut them and soldered jump wire connectors onto it. I also extended the AM2035 cable by some meters. I2C sensors are in a separate box.

Reflection
In general the system does what it was designed for. I’m very happy with the outcome. I haven’t had a chance to test the rain gauge yet. Since the system was up and until writing of the documentation there wasn’t any rain. I also have to still convert the inch to cm.
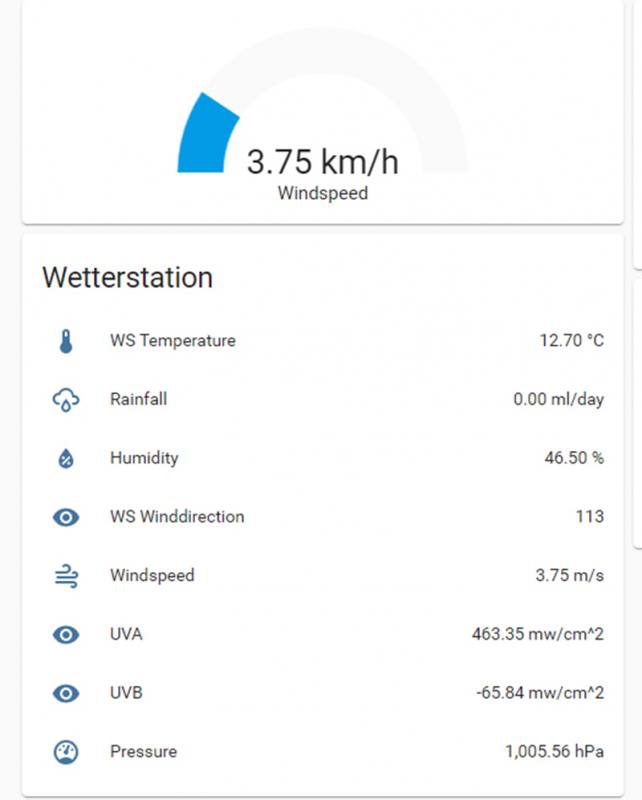
What is working so far?
- Average wind speed of the readings of 2 minutes gets transferred.
- In general the anemometer is working
- Temperature and humidity
- Barometric pressure corrected against the height
- Data logging
- Over the air updates
- WiFi settings
What isn’t working?
The box that houses the board → too small
What needs change?
Data gets currently send nearly in real time, which is far too much – Once every hour should be enough. But since I still have to debug it I will switch to a half an hour rhythm at the end.
Also on the todo list is to translate that readings from the wind fan into directions. Currently its only numbers, makes sens to me but not to Lumia.
UV sensor can’t be behind plastic glass. The plastic filters the UV rays out. I have to think of a different placement. Perhaps decouple the UV sensor entirely from the system, which wouldn’t took long.
Homeassistant offers some nice feature to display statistics, like last high, last low, etc. Would be nice to get automated info.
The placement of the system. It could be higher up, which then needs longer cables.
The code is not yet public.