During a rainy day I went looking for nitrogen fixing shrubs and ended up watching a Geoff Lawton video where he interviewed someone who showed their design process. During that video I noticed that the designer was using a stencil template. Something I used back at school when I was a kid. I then checked all different kind of sources and most of the times those templates offered in different web-shops came from China. I'm not opposing buying form China. For the biogas sytems we used Puxin molds and those are exclusively sold from China. But that was not the point. The point was: I wanted one of those stencil templates now - AND one that is tailored to my needs.
I have a 3d printer sitting around, got it in an Indiegogo campaign years ago, which I occasionally use to create stuff that otherwise I wouldn't be able to create or buy. Like replacement parts if something breaks for example in the kitchen, or when I need a housing for something. I mostly print small parts. 1 kg of PLA filament (Poly Lactic Acid - filament created from corn starch - bio degradable) lasts me for about 2 to 3 years. So, I guess that usage is quit resourceful. I don't print full Iron Man suits - at least not yet.
---------
---------
Intentional Design Process PDCA
The design process used is PDCA. PDCA is an acronym for Plan, Do, Check, Act. (Explained at Wikipedia)
Plan
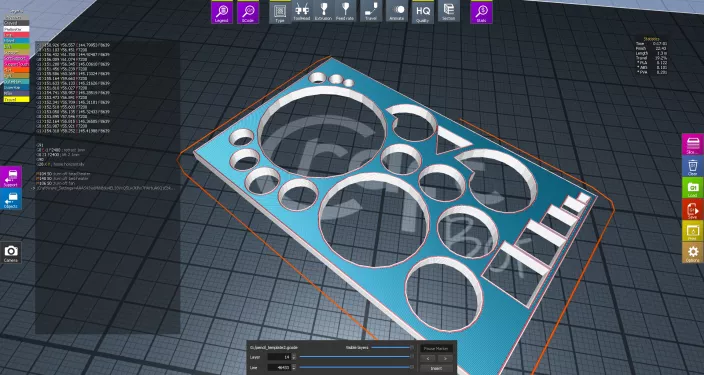
In order to print something in 3d you need to design something in 3d or hope that someone else has already created it and then also shared it. There are many programs around to create 3d objects. I mainly use Sketchup, sometimes Blender. Sketchup is straight forward and until now there wasn't anything I couldn't create with it. Sketchup offers STL export using a plugin. STL files, short for Stereo Lithograph, are the files that are needed in order to talk to the slicer. A slicer is a piece of software that creates a kind of protocol for the printer that tells the printer where to go in the 3 dimensions and what to do based on the specific printer settings. Basically it says something like go to X10 Y11 Z12 and use motor A1 for 0,2 second. The file that holds that information is called G-Code. That G-code file we can feed to the printer. Piece of cake / code.
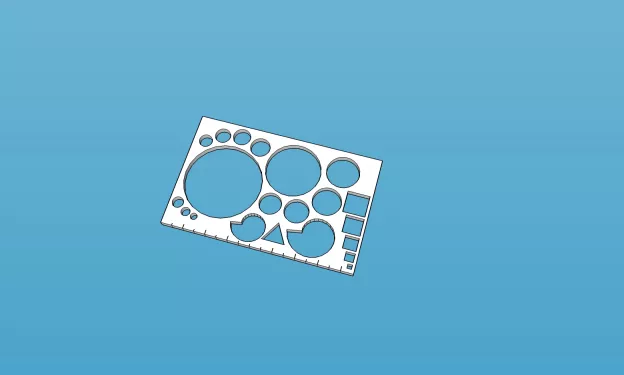
- I mostly work with maps and designs in Illustrator that I have scaled to 1cm = 1m. The biggest object I want to be able to create with the template is a tree with 3m in diameter. That 3m diameter results in 3cm on the design. That's huge.
- I also want to be able to have that tool always with me. Basically I want it to be the size of a credit card, which is 85,60 mm to 53,98 mm. On that my largest object should be able to fit.
- There are some standard permaculture objects that I might be able to include: Herb spiral, key hole garden, 1m³ IBC. Perhaps the key hole garden is something for another template. But let's see during the 3d design if it can fit in.
- Another option is to make a ruler out of it. I should be able to mark every 5mm on the longer side of the card.
- A triangle in order to show tarps for sun blocking.
- Animals could be interesting. Chicken, goats, horses, everything scaled perfectly to the 1:100 ratio. Perhaps another template.
The guiding principle for this design is produce no waste.
Do
I first need to create the file in Sketchup. I set the credit card size and see how things fit best. In order to place enough elements the distance between two objects might be 2 instead of 1 mm, but I have to see the amount of elements and then place them. I have to keep in mind that I can't place objects too close to each other otherwise the Slicer won't be able to create the wanted G-code or the result will be instable and break.
Relative location is key here. I don't want to print a lot of different variants until I have found the right one. Produce no waste is very important and basically sets a limit. In order to place a lot of circular elements on the card I will place them in a spiral kind of shape around a larger object in decreasing size.
From that I create the STL file and Slice it with the Slicer that came with the 3d printer.
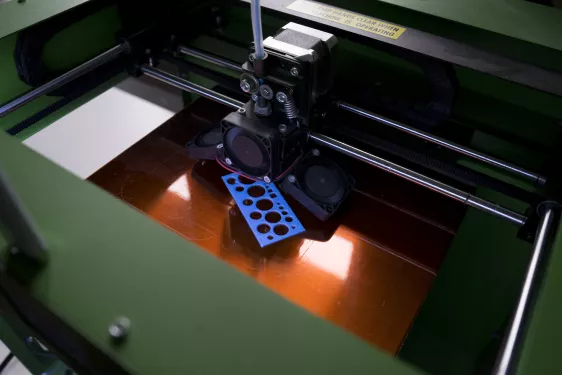
I upload the files to an USB stick and start the printing process.
Check
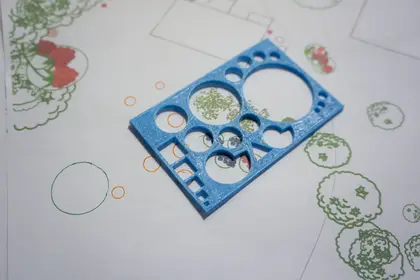
The print came out as expected. It is now for me to test in the field and see if it serves its purpose.
From the first test I think this is very useful. I’ve had it in my wallet for nearly month. No deformation so far.
Act
So far I'm satisfied. No need for another iteration or tweak. The key hole garden can be created using smaller circles, so it is not needed as a standalone form. Of course I couldn't get the animals on the template. The animal template is threfore a template of its own. It is up to the community members to tell me their ideas and what symbols are needed. Or are there any other Permaculture stencils that you want me to design?
Evaluation
Ethics
I accomplish the 3 ethics by creating something that is first of all useful for me. I took care of my design process and created something that is useful to me. As it is not mass produced there will be no heavy burden on resources. The tool will help me to create designs while in an environment where I don't have a laptop with me. It basically allows me to sketch something pretty fast but still be accurate. Part of fair share is sharing the STL-file at Thingiverse and also here at the end of this article.
Principles
- This tool was created using several different principles. First of all "Produce no waste" as guiding principle. I have never seen such a stencil template tailored for Permaculture Designer. It is printable and the intention is to only print it if needed, threfore there is no waste produced. The "Produce no waste" is herein seen literally.
- I also used "Problem is the solution" as my problem was accuracy while sketching designs in a Café. Problem solved, at least for me.
- "Observe & Interact" - watching movies and see the parts that are useful. For me the usage of standard stencil template which I observed and then interacted on.
- Relative location - the placement of elements on the template is carefully chosen in order to maximize the amount of elements on the given space.
- Each element performs many functions - the usage of the elements on the template is defined by the designer, hence the usage of the template is imagination intensive. Circles can be anything, from trees to bushes to water catchment
- Use biological resources - PLA filament is created from corn starch
Due to the constrains given it won't be possible to apply a lot other principles. Principles that are tied to "Land based design", like "Small scale intensive system" are hard to apply to "non-Land based" designs. And the card is actually rather small.
Feedback
Nothing here yet. Check the comments section and leave one!
Reflection
First quick reflection: I printed it twice. So I could have got it right from the first time... I produced waste. I couldn't get the ruler onto it. I'm looking for a better solution. Perhaps cuttings on the backside. The 3d printer uses up energy while printing. The printing time was about 8 minutes. I could have checked the amount of energy needed.
End credits
I used the following tools:
- 3D-Design: Sketchup
- Slicing: CraftWare
- Publishing: Thingiverse and Beyondbuckthorns
- Documentation: Wiki
- Process: PDCA
- Time consumed
- Writing and Photos: 2,5 hours
- Design process: 2,5 hours
- Implementation: 2 hours
- Thanks to Lumia for constant help, translation and proofreading
| Attachment | Size |
|---|---|
| permaculture_stencil_template.stl | 468.62 KB |


