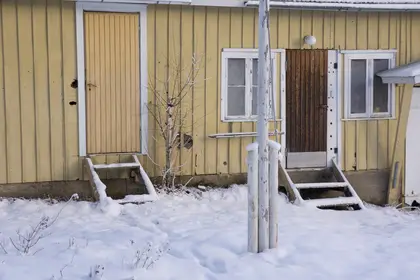
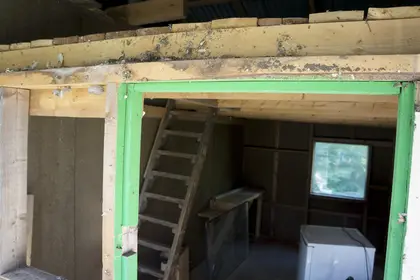
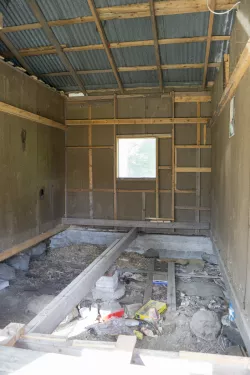
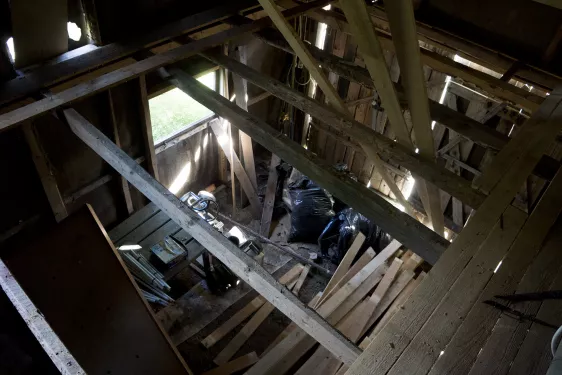
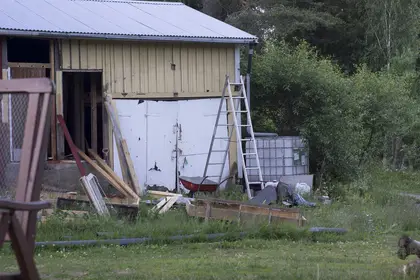
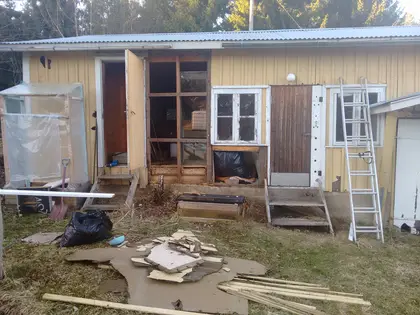
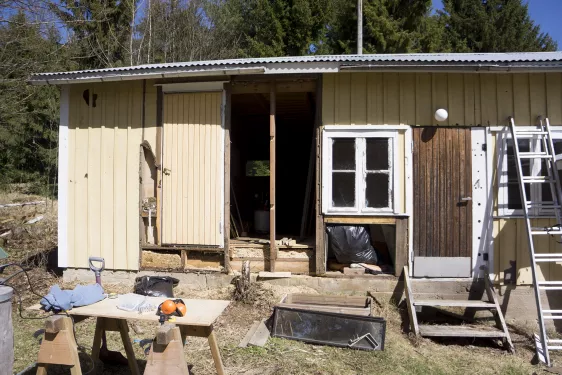
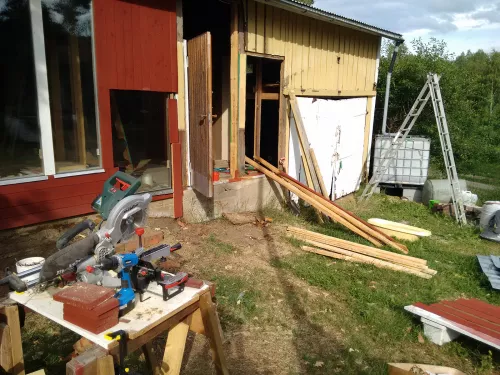
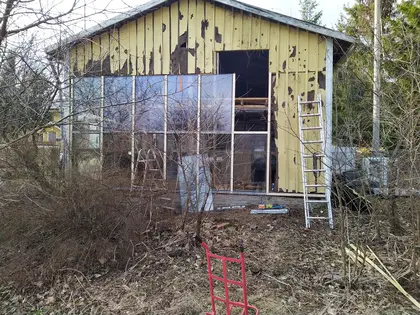
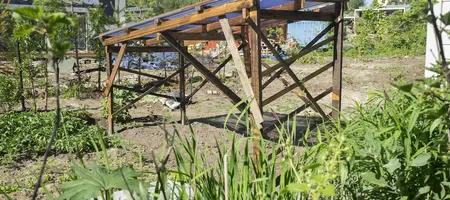
It is 2017 and my parents were on holidays at Beyond Buckthorns and they told me during a walk that something needs to be done with one of the sheds, especially with the color of the walls, which was already coming off. A confession: the color of the shed really didn't look very nice and was coming off, and actually not even the color, but parts of the entire wall were coming off. But from my perspective there were other things around I had to worry about more. And, my todo-listTM had already a lot of tasks on it. More tasks for me? No!
To go further back: the shed wasn't really of any use to us when we came to Finland. All parts of it were full of stuff and we weren't really in any need for more storage room. We just put it aside and went for other, more important projects. It was always my intention to create a proper permaculture design for it. And be it a marvelous design. One that kings and gods would be proud of. (or at least my tutor)
I'm going to use GoSADIMET as a design process. This design is written to be on the funny side, so please forgive my sometimes funny language.
Intentional Design Process: GoSADIMET
Goal / Vision
Let's take some time to think about ourselves, have a yoga session, watch "The Big Lebowski" and start with a question: What do I want to see to come alive in the context of the shed in alignment with the permaculture ethics and principles?
- Earth care: I need the blue flame to guide all those in search of wisdom in the dark night to a glorious end. I want to grow food beyond the realms of time and space. I need a winter residence for the tame feathered egg laying beasts (chicken as the earthlings call them). Reducing my carbon footprint by creating food and energy on site.
- People care: a place worthy of my mighty frame. Where I can rest after all those battles I fought across the galaxy (and Facebook). Dreaming big without the boundaries in mind. Building something that Lumia can enjoy as well. Taking care of some of my needs.
- Fair share: let everyone take part in the journey, the endeavor, the challenges.
Survey
Where are we? What is the context?
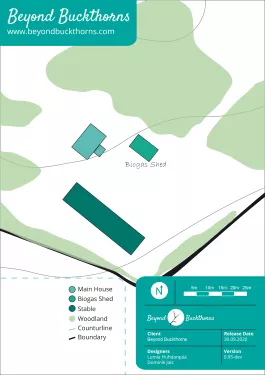
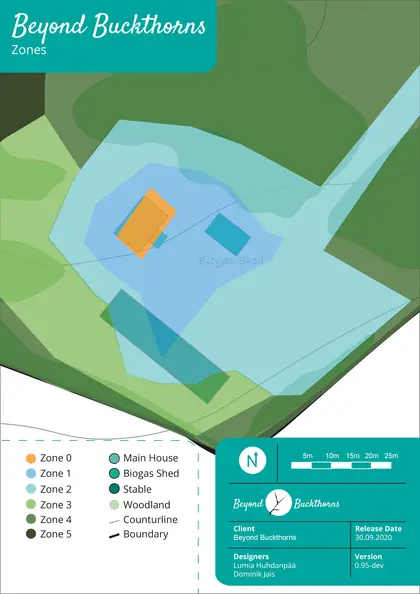
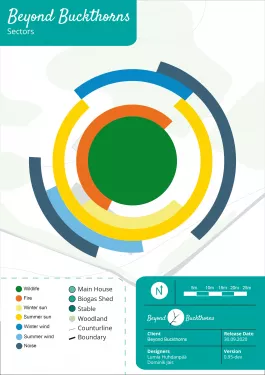
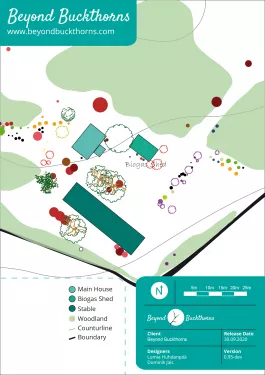
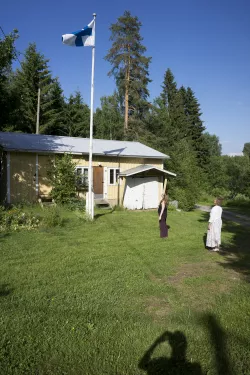
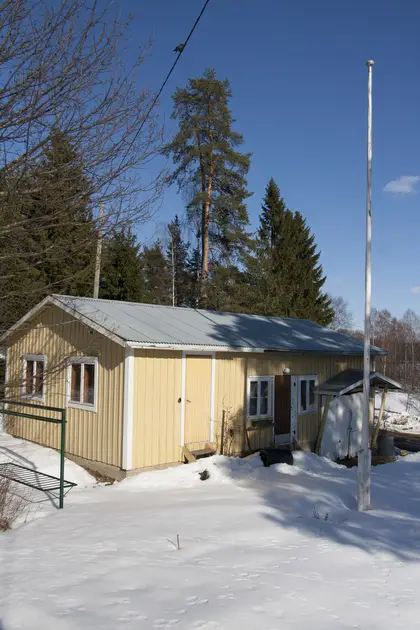
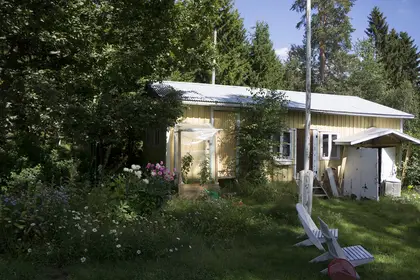
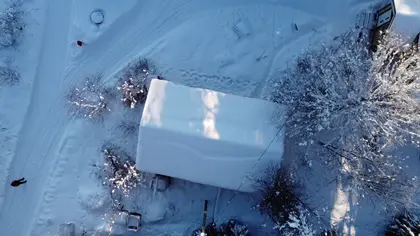
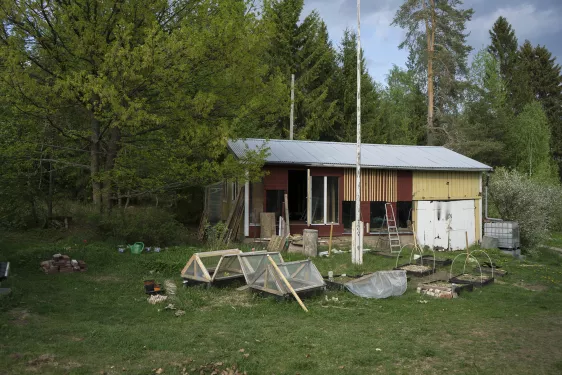
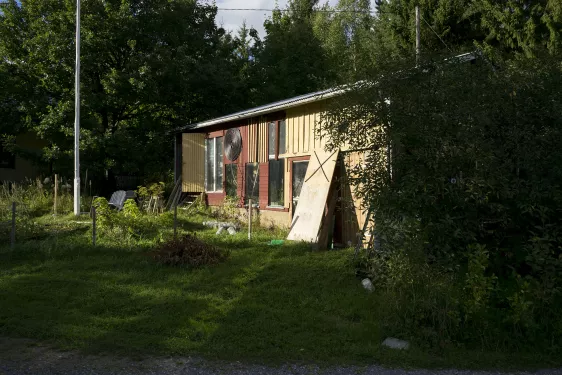
Beyond Buckthorns is a homestead at 61°N in rural Finland. While working on the concept and the design for Beyond Buckthorns Lumia and I created a base map and overlays like zone- and sector analysis and we used some other permaculture related tools. All that gives you first idea where the biogas shed is located in context of the entire estate. The shed is in Zone 1. Close to the main house. See the pictures below. I also included a drone photo.
Weather data
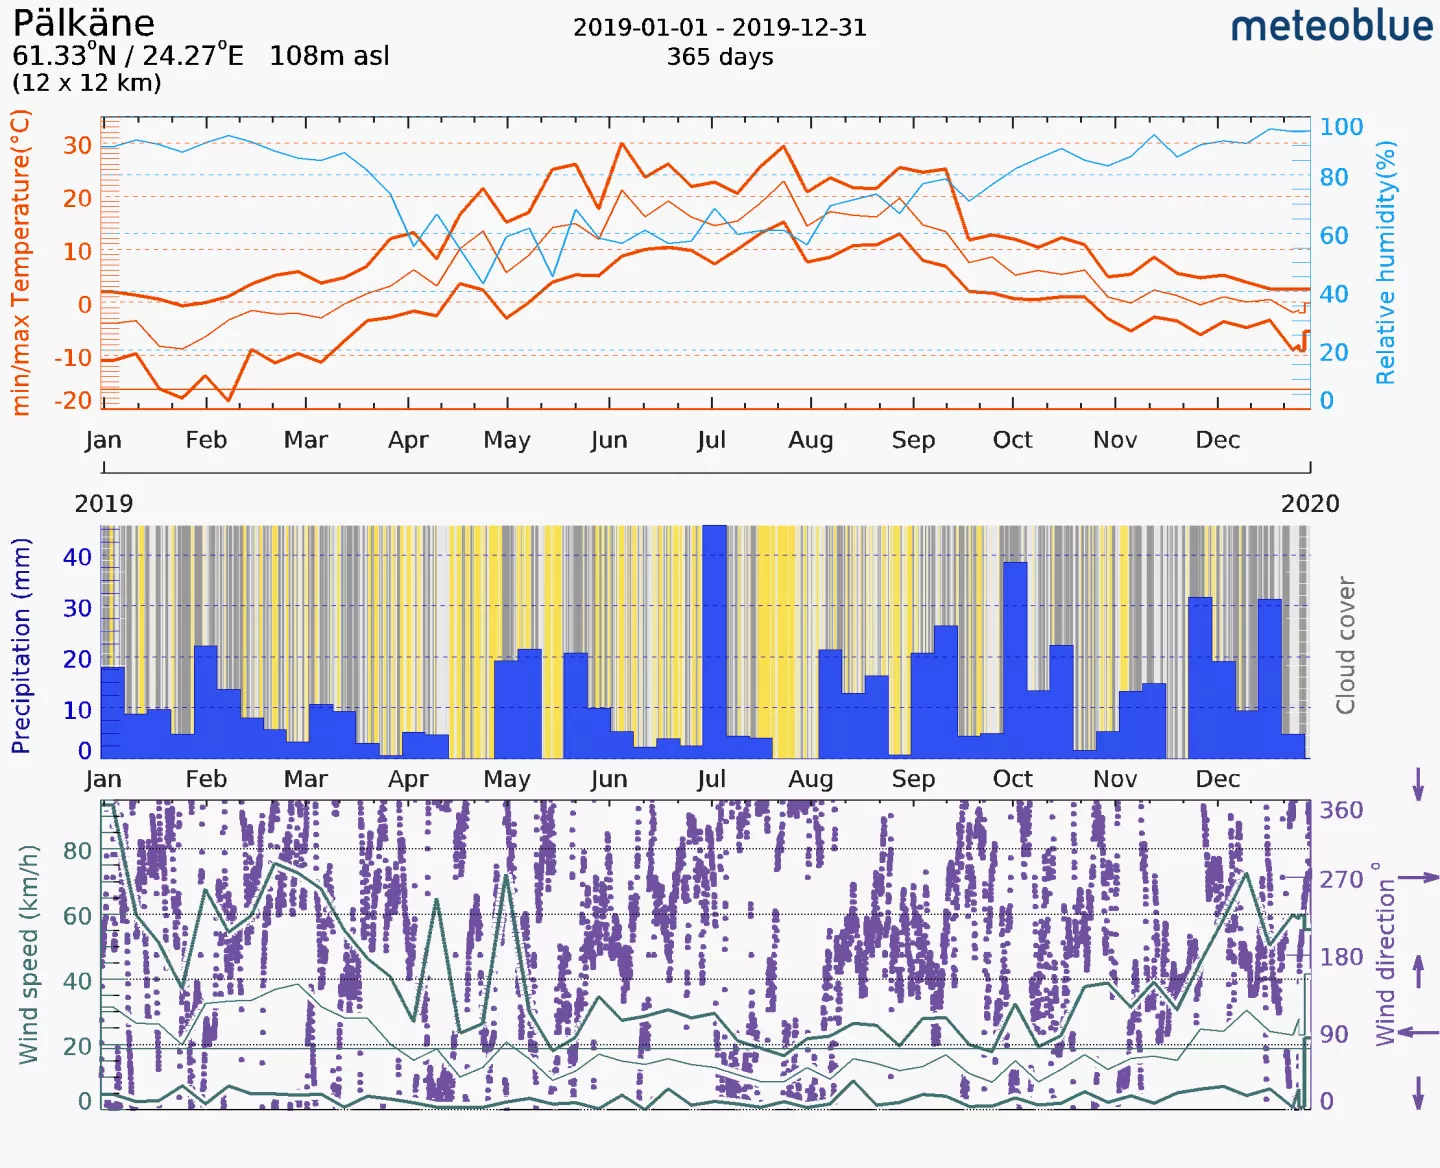
The outdoor growing season is from April / May to September / October depending on the vegetable or fruit. We hardly hit + 30°C in summer but often -20°C in winter. If you look at the precipitation you see 3 gaps. One at the start of the growing season, one early in the season and one in the middle.
I have temperature and humidity sensors in the shed since December 2018 to see the temperature difference of the ambient and inside the shed. The shed is during winter times about 2 to 3,5°C warmer than the outside. So the structure and walls are able to retain warmth a little. During a summer day the temperature different between night and day is about 10°C.
The sun hours in Finland are pretty clear and don’t need any further description.
Size, Orientation, Structure of the building
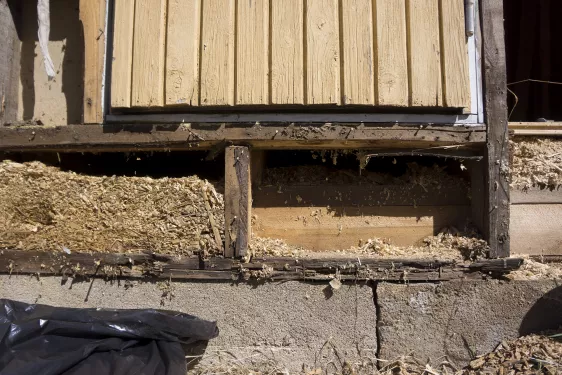
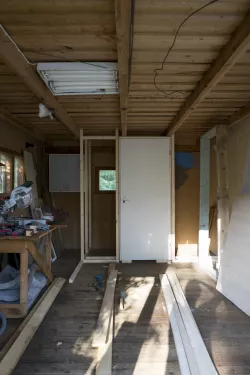
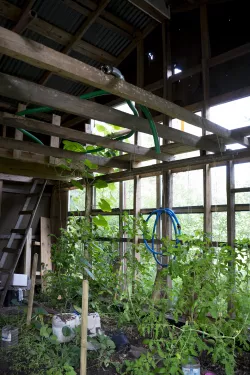
The shed is a huge, a castle worthy of a mighty king, actually a 60m² multi functional building that comes with a workshop, a room for weaving and a garage which is used to store all kinds of stuff. All 3 "rooms", which are 1/3 of the length of the building each, have a 2nd floor but only 2/3 of it is usable. Usable in the sense that a dwarf could stand there but I can't. The structure of the building is made with strong timber. Powerful enough to withstand the southern summer – and northern winter winds, as well as the heavy snow load. That timber frame sits on a for Finland typical concrete and stone foundation. The frame has an outer layer of some kind of pressboard with color added to it. Good idea but doesn't last. Or actually lasted for thousands, ok 30 years, but will not for the next 30. While the garage and the weaving room have only the pressboard on the timber frame the workshop has one layer of pressboard, 10 cm of sawdust insulation, and then another layer of press-board - but only on the northern and western wall.
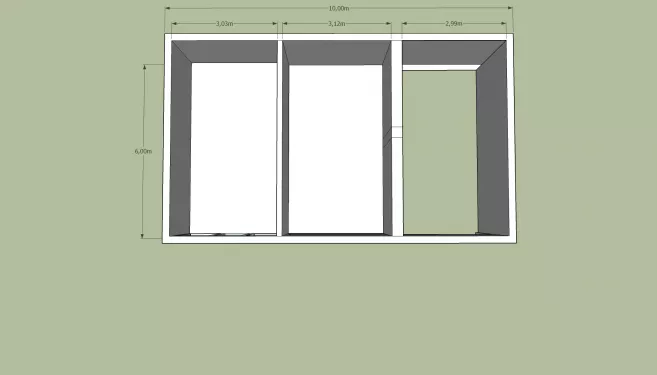
In a nutshell the mighty shed is about 10 x 6 m and has a gable roof. The orientation of the shed is nearly perfect. The front side is facing south-east while the long side is facing south-west.
The timber frame seems to be very well in tact. What would I expect from a building created for kings to party on. I couldn't find any molds or other problems. But not all parts are accessible to me. I might find surprises later. The floor planks look pretty good. It sometimes smells like a mouse is rotting away in the dungeons. There are two windows on the north east facing wall. Those windows can't be opened. There are two windows in different height on the south east facing wall and 2 windows on the south west facing wall. And there is a window at the north west facing wall.
The sheet metal roof definitely has some leakages. Seems like some of the nails have rusted away or the gaskets just broke.
Surroundings
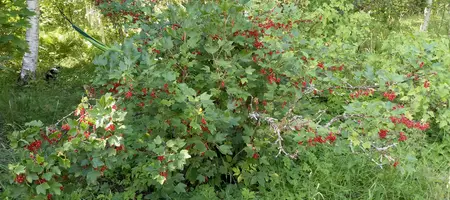
The shed is on the east and north-east side shaded by forest. The distance to the forest is about 5 to 8 meters. There it also has partly some kind of concrete floor is covered with moss. On the south-east front side there are some rose bushes, cherry trees and a variety of herbs. There is one oak, and a mighty oak it is, on the north-west side, between the main castle and the shed, which gives a lot of shade in that area. There are some deciduous trees in combination with one spruce in the North-east corner.
The south west area is unused; besides a flag pole. There are two huge pines that shade the shed for about 2-3 hours per day during summer time. Mighty they are.
Soil
Only the garage part gives access to the soil. The workshop and the weaving room have a wooden floor. The soil in the garage is probably polluted with all kinds of combustion related stuff. There are multiple signs of oil. There a parts of boxes full of what seems to be rat poison. There is an unidentifiable white powder which looks like chalk. There is other stuff I have no idea of what it could be. Oh those humans and what they do to Earth.
Animals
Many decades ago that shed was used to keep animals. During that time there weren't any floors integrated. Now there are only some small lizards, a bunch of bumblebees and maybe in the darkest corner some mice / rats.
Rain water catchment
The two longer sides of the shed come with partially installed, very rusty, leaking rain gutter. Besides the gutter leaking away the water just runs off on the lower South-East end on the backside. No collection, just straight to the soil. On one side at the front there was a barrel for collection.
Additional findings
- The shed is connected to the main electricity line. It also has a telephone cable running in to it.
- There is an extra fuse box for the shed
- The North-West and parts of the North-East wall is insulated
- There are two huge and massive working benches in the workshop, one is fixed to the wall
- There are multiple boxes of nails and scrap metal available, some of it seems to be useful.
- There is an unused shelf, an old bicycle, two quadracycles for kids and a motor
PASTE Sheet
In order to get a clear overview of what we have and what we want I created a PASTE Sheet.
| have | Plants | Animals | Structure | Technology | Events |
| nothing | maybe rats? | Main floor | loom | ||
| lizards | Garage floor | metal workshop (falling apart) | |||
| bumblebees | Second floor | garage (cramped up) | |||
| wants | Plants | Animals | Structure | Technology | Events |
| Tomatoes | Chickens | Place to put a mattress / yoga mat | Biogas plant & all what is needed for biogas production | some, nothing specific | |
| Basil | lizards | Lots of windows | Rain water storage | ||
| Pumpkin | bumblebees | Hanging chair | Wifi | ||
| Trees to grow inside | Greenhouse / Atelier | Sensors + Data logging | |||
| Flowers | Greenhouse | ||||
| etc | Recreation | ||||
| Storage | |||||
Resources & Budget
The resources somehow depend on the design.
- For now I don't want to spend more than 2000 € for the entire shed.
- I can put about 1, perhaps 2 hours per day into the project. Depends on the time of the year and how much other workload happens.
- Talkoot – the Finnish version of a barn raising.
- A lot of wood from other buildings.
- Some unused removed doors. Some pretty heavy, therefore ideal for winter time.
- Natural red color ready for mixing it with water.
- Thousands of nails of many different sizes.
- The infinite depth of 2 workshops that need to be searched and for all kinds of useful stuff.
- Many woodworking tools, one mightier than the other.
- Lumias input on parts of the design whenever needed and her encouragement to get things done.
- Friends online that are able to comment – the community in general
Analysis
Let’s see what we got so far during our survey.
I first put the observation items into a PMI
PMI
| Plus | Minus | Interesting | |
| Pressboard | Easy to remove | Can’t be reused | |
| opens up possibilities | has paint on it | ||
| needs to go to recycling facility | |||
| extreme low insulation value | |||
| Structure / Timber frame | sturdy | some smaller problems | suitable for hanging things |
| low maintenance | |||
| somehow easy to repair | |||
| Temperature difference | benefit for plants inside during winter | not enough for growing year round | |
| Benefit for animals inside during winter | |||
| Soil | can be build on | will be difficult in the beginning | As Dan put it: “whatever soil you have put organic material on it” |
| Electricity | makes working there easier | needs to be maintained | |
| use of power tools possible | |||
| available materials | can be used right away | might not always fit | |
| no need to buy things | |||
| Tin roof | leakage needs to be stopped | easy to remove | opens possibilities |
| doesn’t let light in | extreme low insulation value | Removed parts can be used somewhere else | |
| Orientation / Placement | good orientation | ||
| long sun hours | |||
| Surroundings | nice area with the oak | the cherries blocking sunlight heavily | interesting area „behind“ (North-East) |
| the south-west facing wall gets a lot of sunlight | some of the oak branches are pretty low | ||
| the south-west wall is very warm in summer | some of the trees at the northern corner clog the rain water catchment heavily | ||
| soil before the south-west facing wall is pretty poor – mainly sand | |||
| Rainwater catchment | easy to fix | broken, rusty, not collecting | |
| enough rainwater to catch | |||
| Concrete foundation | cracked on the south-east side | ||
| Insulation | one room nearly fully, including floor | only partly |
Afterwards I also put them into a SWOC
SWOC
| Strength | Weaknesses |
| Planning and Execution | Temperature difference |
| Orientation / Placement | Insulation |
| Electricity | |
| Structure / Timber frame | |
| Opportunities | Challenges |
| Cardboard | Tin roof |
| Tin roof | Structure / Timber frame |
| Surroundings | concrete foundation |
| available material | |
| nearly full insulated room | |
| Rainwater catchment | |
| Removing the upper floor |
The pressboard is a huge opportunity. It is so easy to remove. In combination with the available materials, especially the glass, this could make a difference. The tin roof is also an opportunity. I can be easily remove and replaced but his is also a challenge, since removing is easy but bringing a new roof in is difficult. The rainwater catchment is a low hanging fruit. The soil inside and in parts of the surroundings should be easy since it is mainly sand and there is enough compost around. Another challenge might be the structure. It might need a lot of tinkering.
Function, System, Elements
Instead of piping elements from one analysis to the other I took time and used Function, System, Element.
| Function (what) | System (how) | Element |
| Recreation | Garden of possibility | Swing |
| Air chair | ||
| Yoga mat @2nd floor | ||
| Chairs outside | ||
| Sun through windows | ||
| Soil improvement | Nutrient cycling | Biogas effluent |
| Charcoal | ||
| Compost | ||
| Mulch | Wood chips | |
| Straw | ||
| Food production | Multi layer garden including trees | Trees |
| Shrubs / Bushes | ||
| Ground cover | ||
| Climber | ||
| Rooters | ||
| Mushrooms | ||
| Sun through windows | ||
| Water | ||
| Winter chicken coop | Chicken | |
| Water | ||
| Other | Pots on shelves | |
| Biogas research | Small scale research facility | Biogas digester |
| Biogas storage | ||
| effluent storage | ||
| pumps, pipes, hoses | ||
| Sensors + Data logging | ||
| WiFi | ||
| DIY sustainable energy research | Garden of possibility | Biogas |
| Solar Air Furnaces | ||
| Solar cooker | ||
| Sensors + Data logging | ||
| WiFi | ||
| Teaching | demonstration areas | Indoor Food Forest |
| Biogas digester | ||
| Winter chicken coop | ||
| New trees and bushes | Small scale nursery | Pots |
| Storage space | ||
| Water |
Limits and needs
The key needs of this design are:
- A Biogas system
- Winter chicken coop
- Indoor multi layer garden including trees
The key limiting factors are:
- time
- money
Design
The guiding principle of the design is important functions are supported by multiple elements. I use the principles always but not explicitly.
From pattern to details – deciding the areas starting with the base map
A base map of the shed and its surroundings were a simple task to complete. I pasted it first, then measured it with a tape measure for accuracy. Working with 1:100 ratio, 1 cm on the map is 1 m in real, is the easiest for drawing in a checkered book. Each square is 0,5 x 0,5 cm (0,7 x 0,7) and therefore I need 20 by 12 squares. And on that squares I can fast draw pretty precise what to put where. So the shed map is nothing more than the shed with all the walls, doors and windows. The overlays are objects, water pipes and electricity.
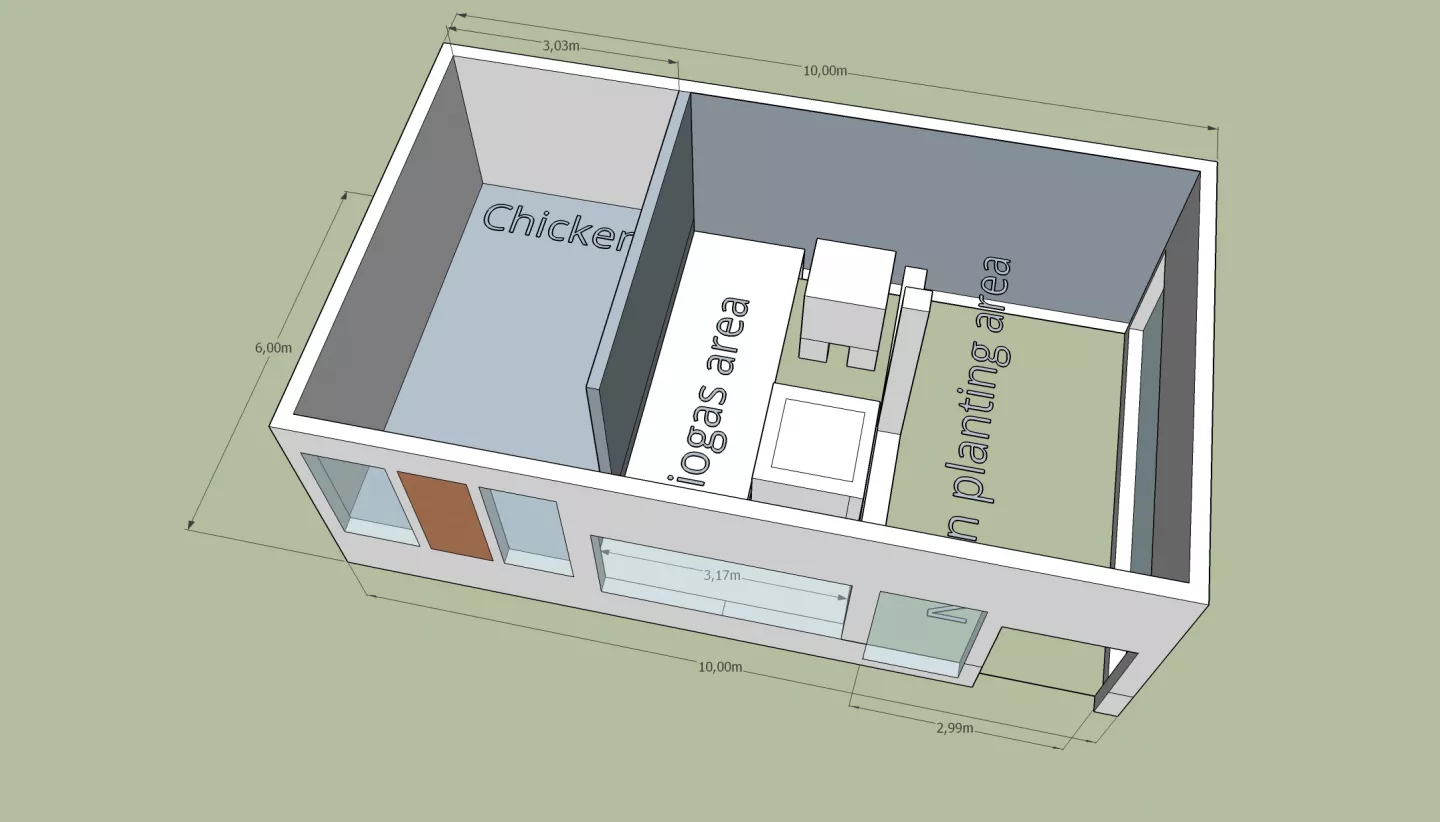
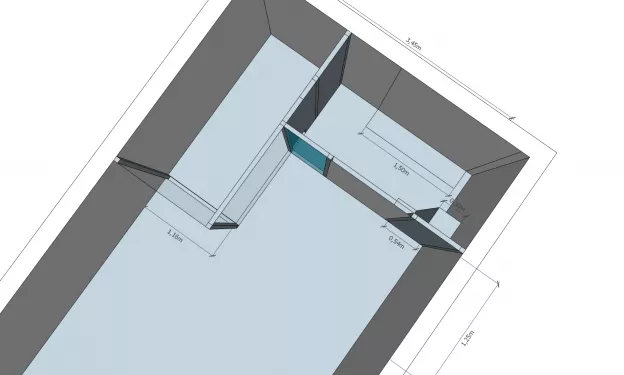
Another version is a 3d design created in Sketchup. It is more accurate then the one drawn in the checkered book. It also comes with in 3d. If you want to design for the gods you need mighty tools.
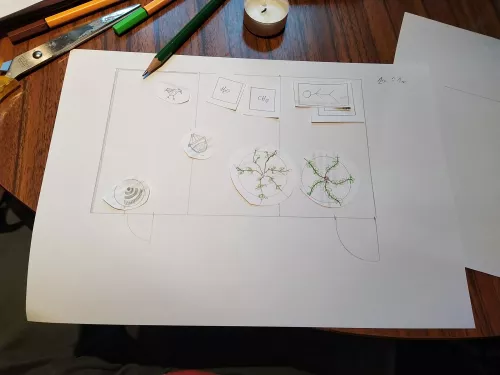
Bubble map
I started to put all the WANT elements from the PASTE sheet on a list. Key needs first.
- Biogas research facility
- Multi layer garden including trees
- Chicken winter coop
- Recreation
- Teaching
- Surrounding
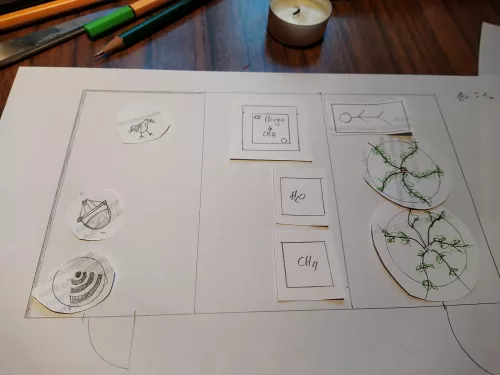
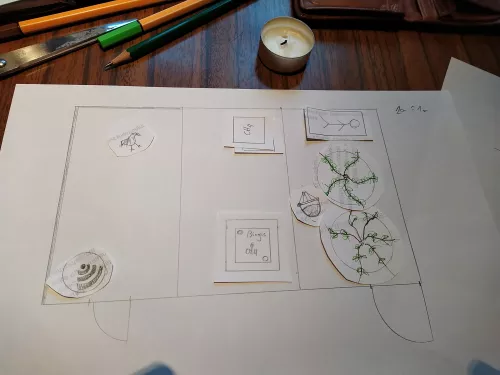
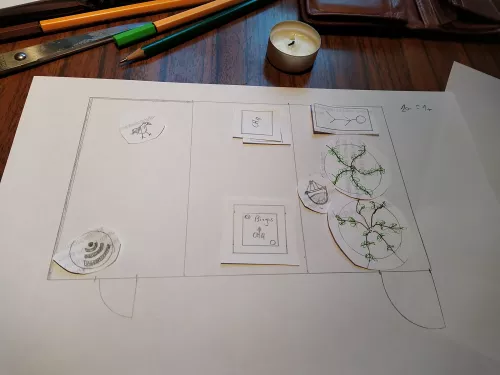
I drew the base map on a piece of paper, 1 cm ~ 1m = 1:100, and then drew the elements I wanted onto separate pieces. This type of bubble map is one with movable parts.
The best outcome was the placement of the winter chicken residence at the insulated side on the left, while the biogas is in the middle, and the growing area is on the right. That gives the most southern area for the growing area. The plants that will grow there will benefit from the extra light.
McHarg exlusion
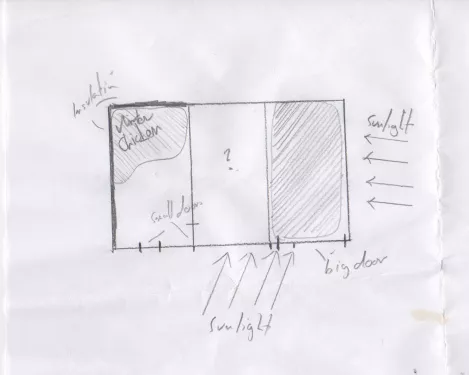
I also did a McHarg exclusion to be on the safe side. See the drawing below.
The winter chicken coop goes into the insulated area because there is already insulation and therefore it needs only a small change (least change for maximum effect). The main grow area has to go to the right because this is where the most sun will be. The biogas system can’t go into the chicken coop area since the beams are not wide enough to let an IBC in. It is also difficult to enhance the floor to carry the weight of the biogas system. The biogas system also can not be in the growing area because then it won’t be high enough to use gravity flow for the effluent. The water storage system also can’t go into the growing are. It would be a waste of perfect growing space.
Flow Diagram
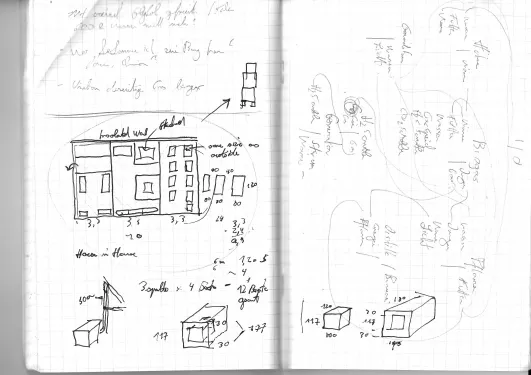
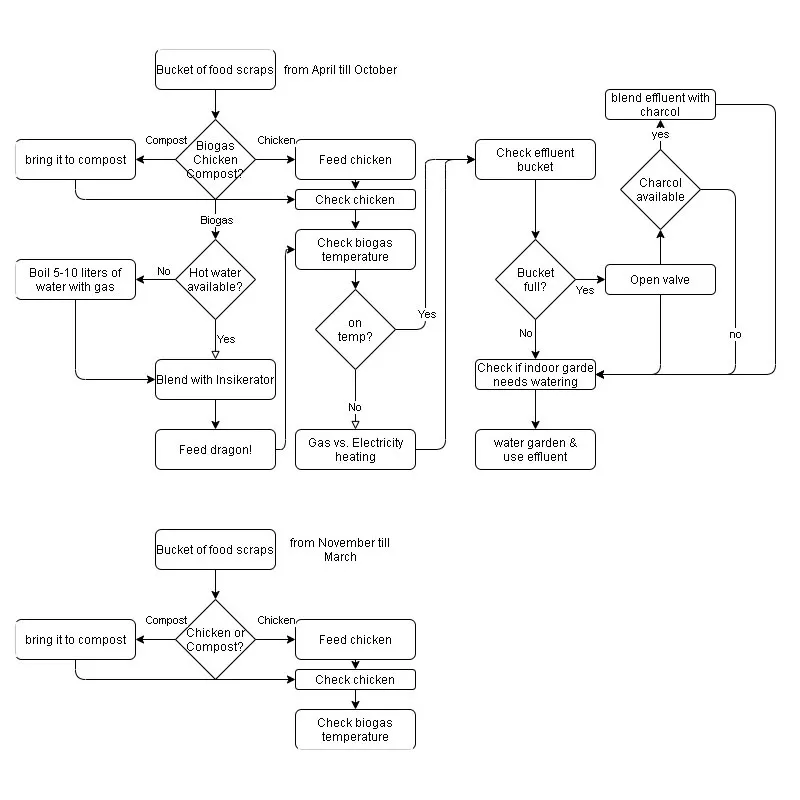
In order to see what an element needs and creates I created a flow diagram. I wrote it down on paper but also used a software. Both versions worked for me.
The flow diagram also helps with placement since short walking distances and organised workflows cuts time consumption.
Location of elements
The base map, bubble map in combination with the McHarg Exclusion and the flow diagram helped to get the relative locations of elements nailed. See the picture below:
Glass / Window
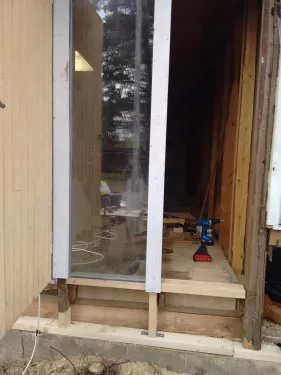
As I described the walls of the building earlier, they only consist of structure and a very thin cover. The good thing about that is: it is easy to remove. When I had the idea for the greenhouse I ran some calculations about how much glass will be needed. A lot. In order to transfer it into a greenhouse I need the majority of the south west facing wall to become glass. That's about 20 m². And then I need the south east facing wall to become glass, which is about 15 m². Luckily I got a little bit more than what I needed second hand for the price of a Jägermeister bottle. And this glass is actual insulated glass. Lucky me.
The difficulty with the existing beams are that they don't match the glass width. It would be to difficult to close the gaps. So I put a 2x4" construction of gaskets, glasses, beams, etc. up to a heights of 3m – matching it with glass I have available. This construct makes it possible to use up most of the 2nd hand glass without playing Tetris. In order to fit it perfectly I run some calculations in a spreadsheet.
Water supply
Upgrading the shed's rain water collection to store water in a 1m³ IBC will be one of the first things on my action list.
I need to tap in the unused potential of the entire roof of the shed, which is about 70 m². During the growing season the average rain fall is about 60mm. This could give me about 4200 Liter of water. 4 IBCs already filled (theoretically).
All the water storage needs to designed so that everything can be watered by gravity. It is efficient energy planning. I also have multiple IBC’s for storage. Multiple elements for important functions. I don't want to use a pump for watering the plants. And we shouldn't forget about the chickens, they need water as well. Which brings us up to them.
Chickens
We need to remember that the chickens will be in that part of the building only during the winter time. We also have to keep in mind that this is one of the parts where the whole is divided between Lumia and me. We decided to go for about 4 to 7 chickens without a rooster. We are looking for the Finnish native chickens that can withstand the cold winters. The outer walls of the former workshop are all insulated.
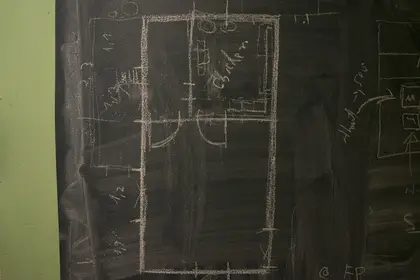
While reading about chicken I came across one number: 0,5 m² per chicken. With 7 chicken we are looking for a minimum of 3,5m³. The former workshop has a total of 19m³. In order to come up with a proper design I drew the chicken coop part of the building onto a blackboard with a 1:10 ratio (1m ~ 10cm) and then we started to test certain scenarios with the principles in mind. As we have two windows in that room, one to the north east the other to the north west we already fulfilled the quality without a name criteria.
The final winter chicken coop design comes with an insulated area and an open area secured with chicken mesh. The insulated area also has an insulated glass to the front so that light can get into the coop from two sides. The area secured with chicken mesh is designed with the structure of the building. It could later allow for an opening to the outside.
Biogas
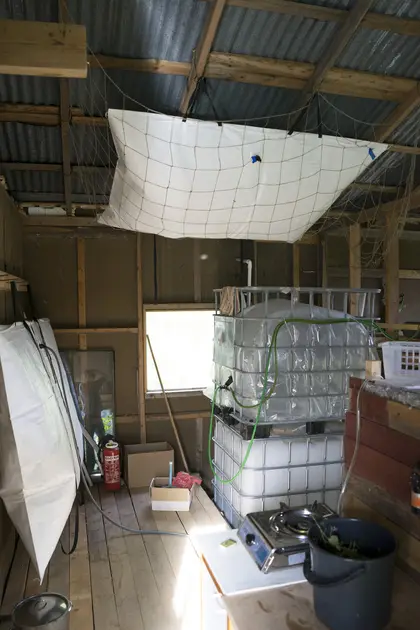
The biogas system consist of a 1m³ IBC. It is based on the Solarcities IBC biogas digester design. As the system will be described very detailed I had to put it into its own design. It will be a design on its own. But to sum it up. Biogas is "cycling of energy, nutrients, resources". With it we "catch and store energy". It can be best described as a small "scale intensive system", that uses "biological resources".
Grow-Area
Green, greener, greenhouse or actually the grow area. Again about 20m³.
Pathways
In Yeoman’s scale of permanence paths ways are more permanent than the soil or structures or trees. Therefore I put it in early, after I placed the water.
Soil building
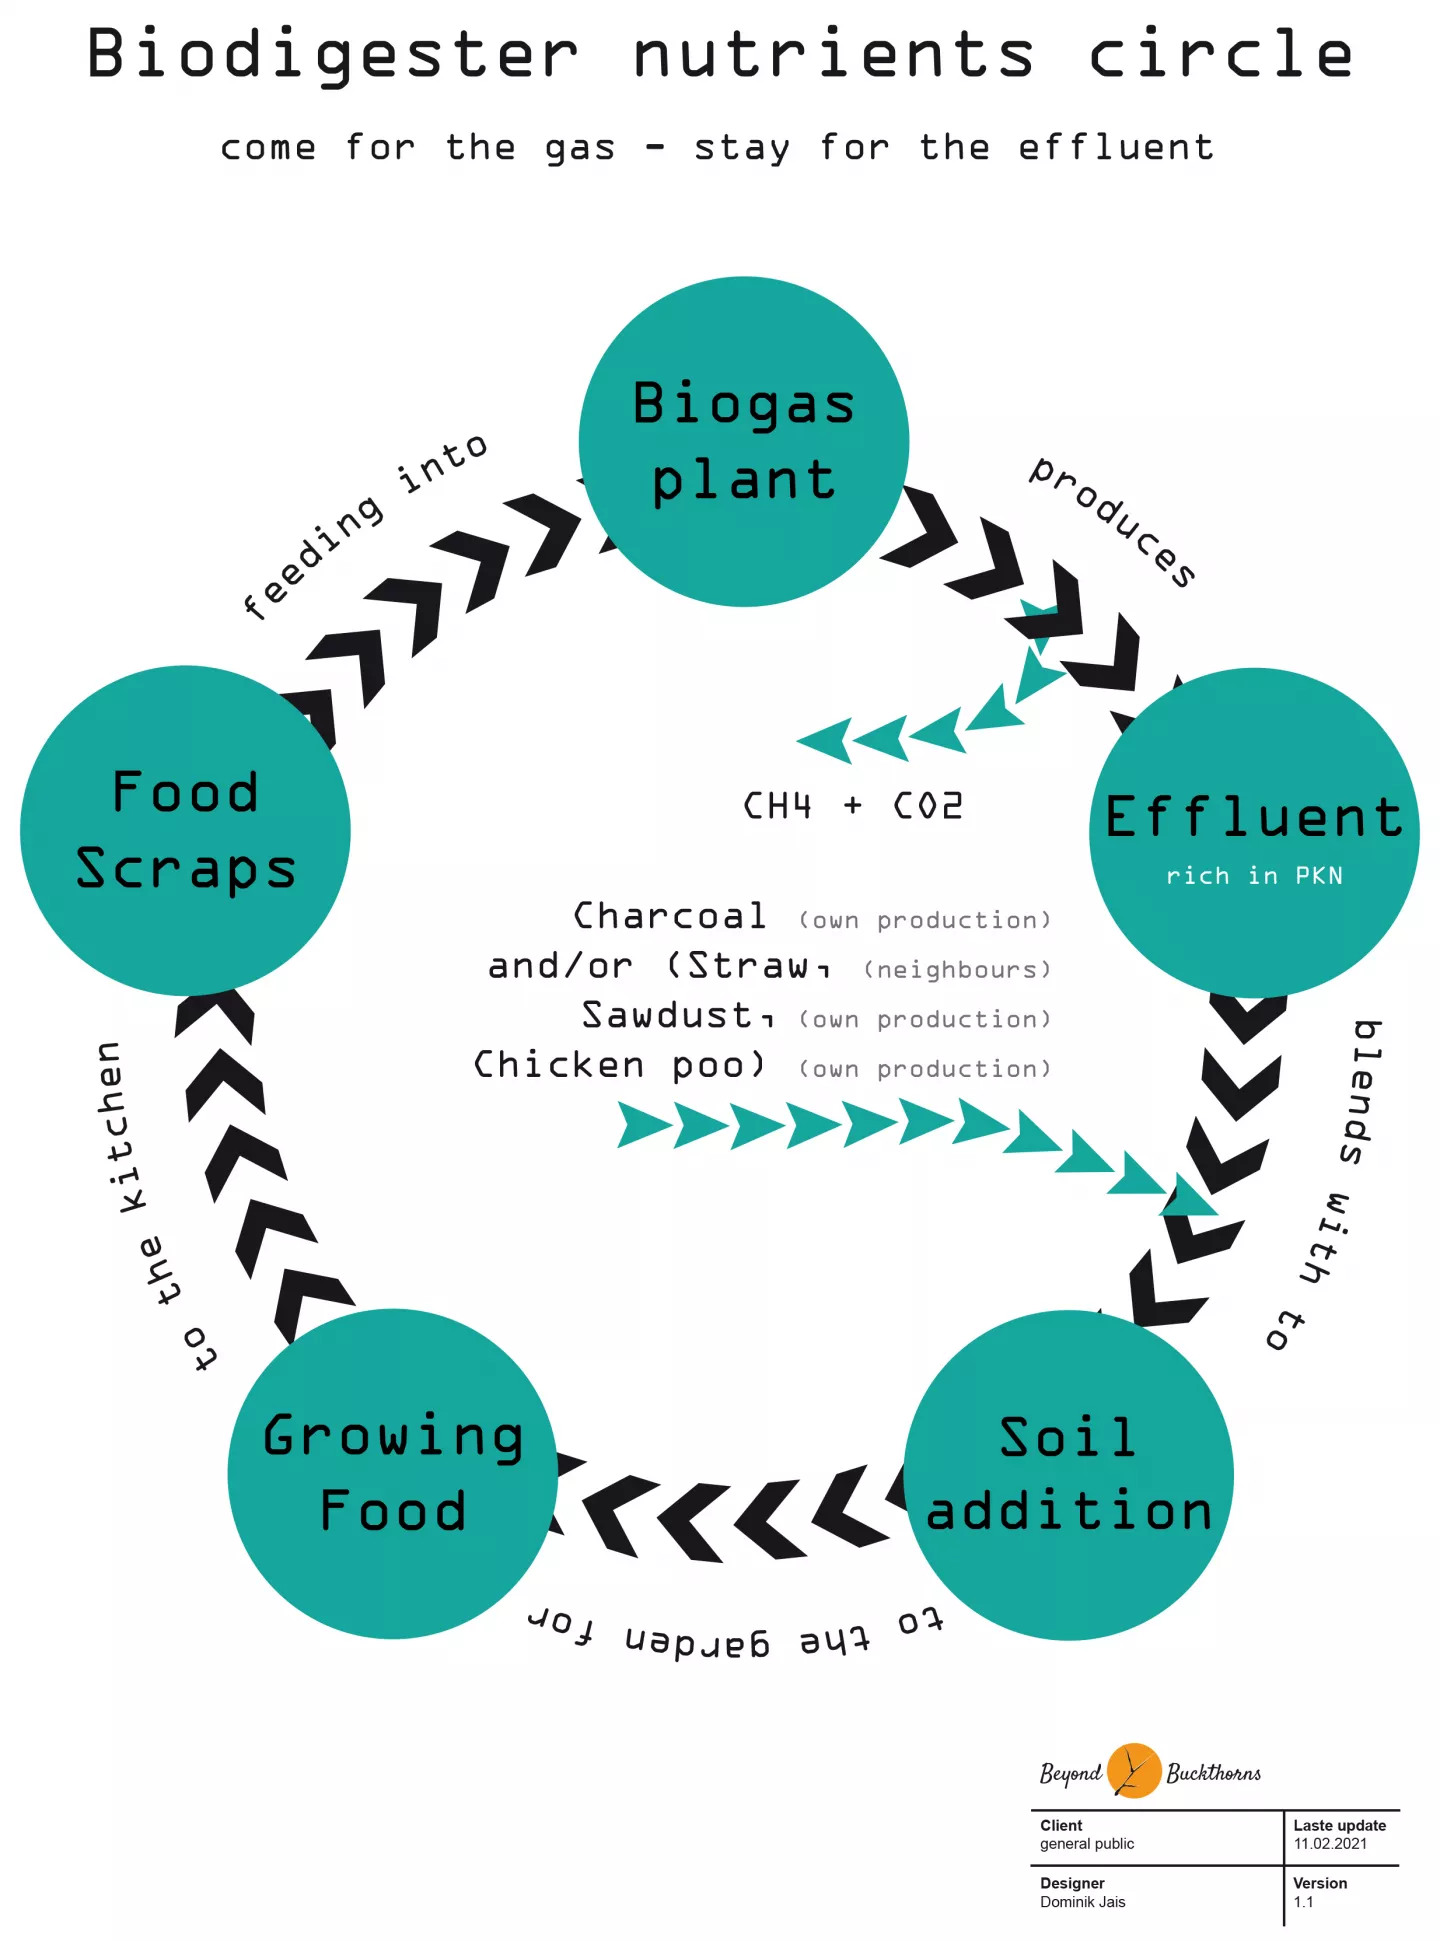
The soil is pretty sandy. Therefore we will start with soil from other parts of the premises plus some compost. Besides that I’ll use effluent charged charcoal. The charcoal got created on the premises. The effluent comes from the biogas plant and contains a lot of PKN (biogas effluent is usually considered a liquid fertilizer – or as I say it in the biogas community: “come for the gas – stay for the effluent”). The charcoal will be charged in effluent for about 48 hours and than deployed to the soil. This puts extensive amounts of carbon into the soil as well as a lot of nutrients.
As a ground cover / mulch there will be wood chips also created on side, plus some straw from the neighbors. Since the grow area needs water I will water the plants with a mixture of 2 parts effluent and 8 parts water, depending on the plant. The wood chips should be able to also retain some of the nutrients from the effluent.
What to grow?
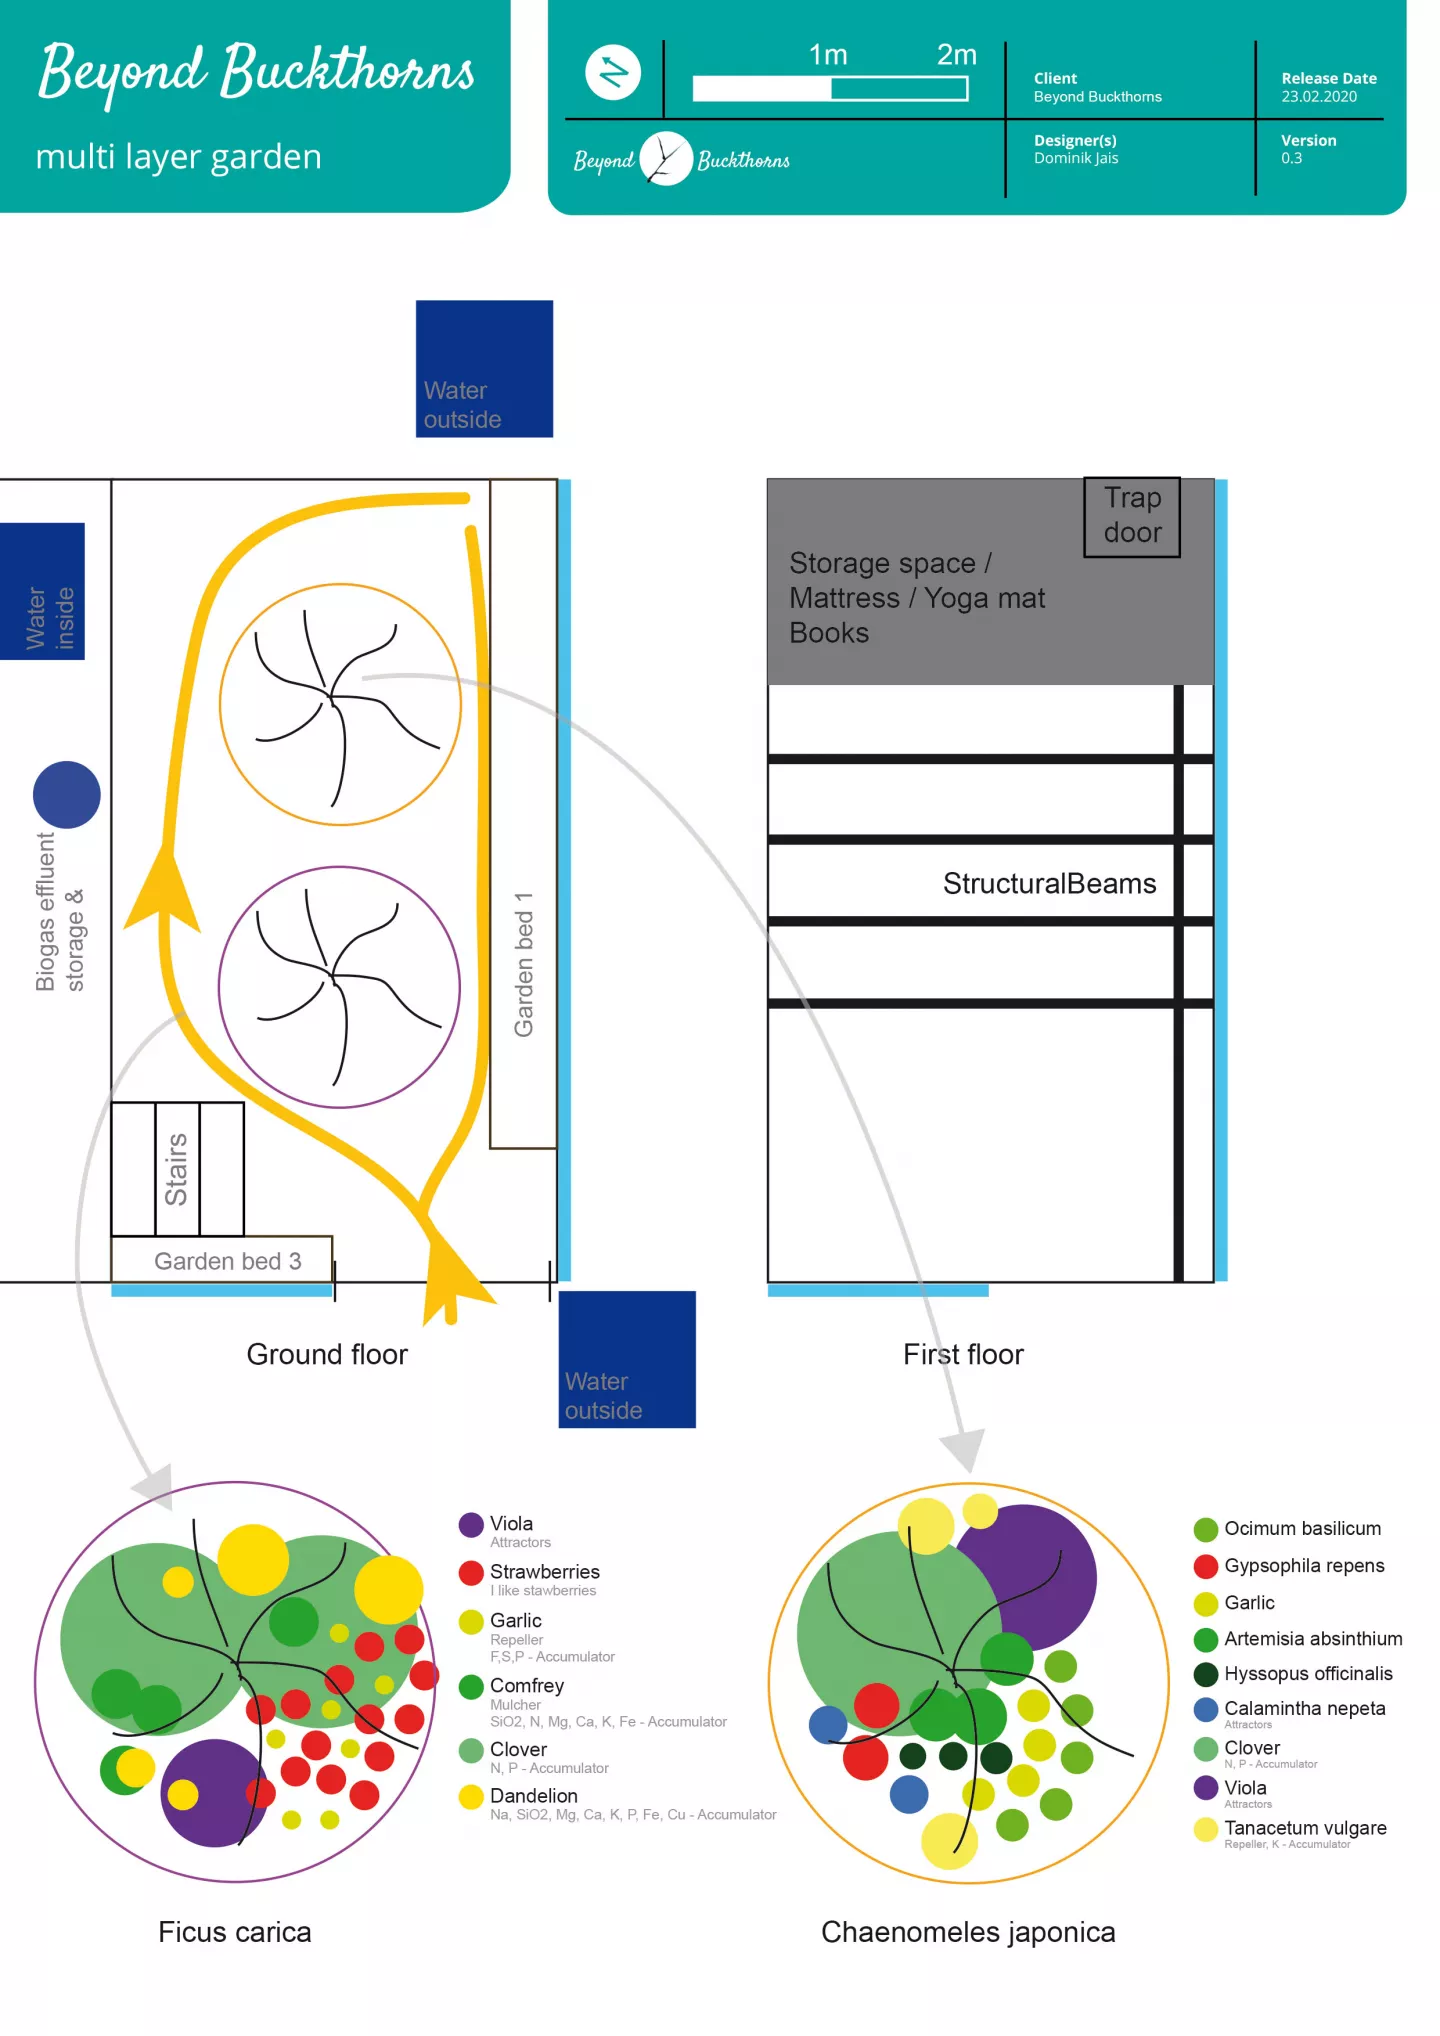
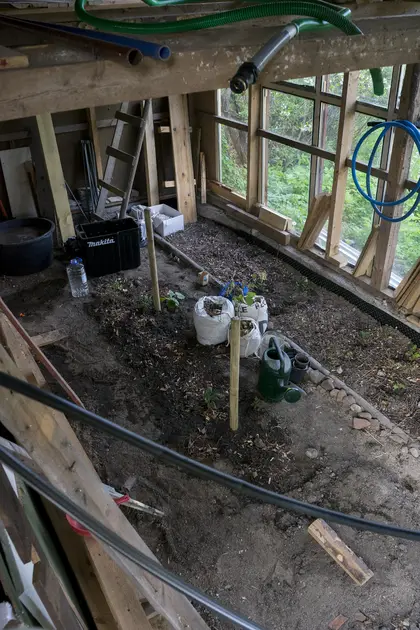
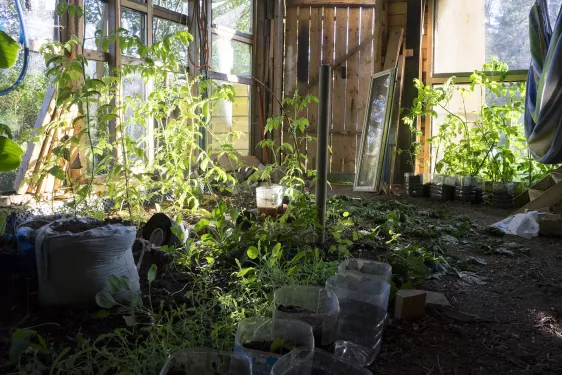
The growing area gives enough space for tomatoes, cucumbers, melons and special squash. Thanks to the inspiration given by Juha I will also put 2, maybe 3 trees inside the growing area together with some bushes / shrubs, ground cover and root layer. What I’m looking for is multi layer garden with trees.
Some years later down the road I will probably also experiment with hydroponics. See the drawing below for two guilds I put together.
Recreation
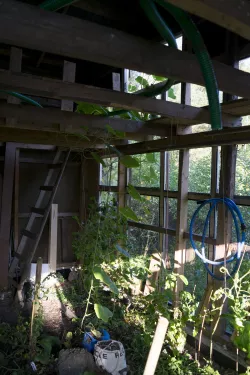
Above roughly 1/3 of the growing area there will be a 2nd floor that is for storage in winter and contains a mattress in summer times. There will be some hooks on the wall that makes it possible to hang a hammock on different places. There will be also a hanging chair inside the growing area. Floating over a field of Zucchini might be just fun. (Actually: it is)
Principles
The greenhouse is a small-scale intensive system, that uses biological resources, especially the effluent from the biogas plant. The resources, especially nutrients are cycled from different growing areas, the main garden through the biogas plant back to the growing area and the main garden. This is also true for the charcoal and the wood chips.
Outside / Surroundings
The edge around the shed, especially the south west are will be used to plant a variety of shrubs and beneficial plants along the wall. There will be an area for sitting and resting close to the door to the biogas shed. The sun is so nice during several times a day in that area. Worthy of having a late breakfast with scrambled eggs cooked on a biogas stove or just enjoying the day.
Since the soil on the south west facing wall is also pretty sandy I’ll put wood chips, diluted effluent and some charged charcoal in it to start with.
The south east facing wall is full of cherry tries of unknown source, probably wild. They will be heavily cut back in summer time. On the edge will be two parking lots.
Data Logging
If I want to get research going I need to log data – different types of data at different places. Actually the whole data logging aspect will be spun off into its own design. It is simply to overwhelming for me and for you to get into this right here. There is one prerequisite for data to be logged → WiFi. WiFi doesn’t mean internet. It just means connection to the LAN so that I can shovel data to a server.
Social
Once I have finished the implementation process there will be an open day. We will invite family and friends but also the general public to come for "coffee & pulla" and have a chat. A “Richtfest”, as we call it in German.
Summing it up
For me retrofitting the shed is the best possible usage. Actually The problem is the solution. We should have multiple greenhouses on the premises in order that important functions are supported by many elements. I looked for several different locations where to place the biogas plant and there wasn't any other than this shed. The chickens will have a great winter residence. Having movable shelves behind the glasses can be used to for growing seedlings - we usually run out of space for that in the house.
I guess that the Biogas shed design is a good example for earth care, people care and fair share. Once implemented it will show what can be done with all those old buildings that are just standing around empty everywhere in Finland - instead of building new things with heavy carbon footprint.
So if you have a shed you want to transform: Send me a mail using our contact form – I’m your designer!
The final placement map looks like this:
Evaluation before implementation
I went through all the proposed elements and think this design is ready to go. It addresses the challenges and uses the opportunities in context of the permaculture ethics and principles. From my perspective it is save enough to try and then in the tweaking stage I can change those things that didn’t work.
Implementation
Most of the implementation will be handled by myself, but of course I get help from Lumia. She helped me to create an action plan which can be found below (in German):
Action list | |||
| Done? | Was | Reihenfolge | Leute |
| Aktuelle Holzlagerplätze auf Sicherheit & Nutzbarkeit prüfen | 0 | 2 | |
| Popup Holzlagerplatz für Holz im Shed bauen | 0 | 2 | |
| Declutter-Aktion starten | 0 | 2 plus | |
| Dach messen genau | 0 | 1 | |
| Platz für restliches Material finden/machen | 1 | 2 | |
| Suchen & schaffen Platz für Holz im Shed | 1 | 2 | |
| Versicherung prüfen – Strom, Gas | 1 | 1 | |
| Bauverordnung lesen wg. Dachreparatur | 1 | 1 | |
| Lösung für 2. Wasserspeicher finden & durchführen | 1 | 1 | |
| Versatzboden prüfen | 1 | 2 | |
| Sanna für Pfirsich fragen | 1 | 1 | |
| Regenrinne Shed reparieren | 1 | 2 | |
| Leeren Holzlager | 2 | 2 plus | |
| Maurer-Pekka einladen & konsultieren | 2 | 1 | |
| Leca vom Korpi bringen | 2 | 1 | |
| Regenrinnen & Tanks mir Filter versehen | 2 | 1 | |
| Werkstatt leerräumen | 2 | 2 plus | |
| Mauerbau abstimmen | 3 | Pekka+2 | |
| Material für Glaswand kaufen/besorgen | 3 | 2 | |
| Dachbauer suchen | 3 | 1 | |
| Plexiglas suchen & auswählen | 3 | 2 | |
| Plexiglas kaufen | 3 | 2 | |
| Treppen planen & Schrauben etc kaufen für Treppe | 3 | 1 | |
| Treppe 1 bauen | 3 | 1 | |
| Treppe 2 bauen | 3 | 1 | |
| Boden prüfen Shed (Öl, Sand…) | 3 | 1 | |
| Hühnerstall nach Design bauen | 3 | 2 plus | |
| Isolationsmaterial besorgen Hühnerstall | 3 | 1 | |
| 1. Stock bauen um Garage | 3 | 1 | |
| Teile für Hühnerstall isolieren | 4 | 2 | |
| Plexiglas installieren lassen | 4 | Profi | |
| Blechdach reparieren | 4 | Profi | |
| Strukturen reparieren | 4 | Profi | |
| Glas rüberbringen | 5 | 2 plus | |
| Glaswand bauen | 6 | 2 plus | |
| Implement food forest | 7 | 2 plus | |
| Elektrik | 8 | 1+Niko | |
| Türen austauschen | 9 | 2 | |
| WiFi | 10 | ||
| Gasbereich | |||
| Gasbereich aufräumen | |||
| Gasbereich Schläuche binden | |||
| Gasbereich designen | |||
| Nach Gasbereichtasks fertig: | |||
| Spültisch nach oben bringen | |||
| Insinkerator anschließen | |||
| Unbekanntes Timeframe | |||
| Regenrinne Rückseite kaufen | ? | 2 | |
| Regenrinne anbringen | ? | 2 plus | |
| Versatzboden entfernen | ? | 2 plus | |
As you can see from the list; it’s a huge amount of work – that is for sure. Implementation took over about 2 ½ years. Working peu-a-peu on it, when the limits allow it.
Maintain
The workflow diagram I created before was helpful to put a maintenance list together
| Maintenance plan biogas shed | ||||||||||||
| January | February | March | April | May | June | July | August | September | October | November | December | |
| Biogas plant | ||||||||||||
| Check temperature | daily | daily | weekly | weekly | weekly | weekly | weekly | weekly | weekly | daily | daily | daily |
| effluent bucket → overflow | daily | daily | daily | daily | daily | daily | daily | |||||
| storage capacity | daily | daily | daily | daily | daily | daily | daily | |||||
| H2S scrubber | monthly | monthly | monthly | monthly | monthly | monthly | monthly | |||||
| Co2 scrubber | monthly | monthly | monthly | monthly | monthly | monthly | monthly | |||||
| pH | monthly | monthly | monthly | monthly | monthly | monthly | monthly | |||||
| Chicken | ||||||||||||
| what about the chicken* | daily | daily | daily | daily | daily | |||||||
| temperature of room | daily | daily | daily | daily | daily | |||||||
| water & food | daily | daily | daily | daily | daily | |||||||
| litter | daily | daily | daily | daily | daily | |||||||
| Water storage | ||||||||||||
| check water filter | monthly | monthly | monthly | monthly | monthly | monthly | monthly | |||||
| capacity of the IBCs | monthly | monthly | monthly | monthly | monthly | monthly | monthly | |||||
| does the overflow work? | monthly | monthly | monthly | monthly | monthly | monthly | monthly | |||||
| Grow area | ||||||||||||
| water plants accordingly | daily | daily | daily | daily | daily | daily | daily | |||||
| cut trees | once |
Evaluate
Outcome
The Biogas area has been spun off into its own design, since Biogas is a huge topic by itself and is also very knowledge intensive but yet not something that someone comes across very often.
The chicken coop caused me some trouble. I wasn’t clearly thinking about the doors and run into some structural difficulty which, thanks to the problem is the solution, I just switched to a lighter door instead of building a heavy structure to hold the heavy door. Didn’t fully anticipate the time it takes to build it.
The chicken coop is managed by the whole, which means that besides me Lumia has a saying in it. That means: the chicken coop is ready for the chickens to move in, but when that will happen is not entirely my decision and also not within the boundaries of this design.
Since the finishing of the shed fell into winter times and also Corona hit Pälkäne I had to postpone the roofing ceremony until most of the restrictions and problems with Corona will be gone – hopefully in 2021.
Design tools
I got very confused during this design about the tools, especially about which tool is used during which step. For me they are all just tools and they need to fit my needs. I can’t put them into drawers. For example a McHarg exclusion is for me not a survey tool. In order to run a McHarg exclusion I need a lot of data from a survey to be able to see where things can be placed. And when I place things I’m already designing. For me McHarg is an analysis and design tool but not a survey tool. My point remains: tools are tools and shouldn’t be used dogmatically but when they are useful. The more tools I know and can use the better it is. That’s why I used “Functions, Systems, Elements” for the first time as well.
The process
I choose SADIMET as a process before I got into Looby’s web but I found this process a good choice for a land design. I put in a short evaluation stage before I implemented the design. It is more a less to check with a different hat on if the design is ready for implementation. I still find those standard processes like SADIMET and OBREDIMET too sturdy. They don’t reflect reality. From my perspective they are more a framework or guideline that helps along the design.
Personal
Nick’s
Best
One of the best moments was definitely when Lotta came for a visit. Lotta is compared to me very short. She jumped from the biogas part into the growing area and I was just like: “Shit I can’t do that I would just have hit my head” and then she went like “Wow, I like this”. And form me it was like “Yes!”.
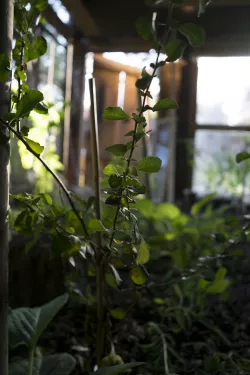
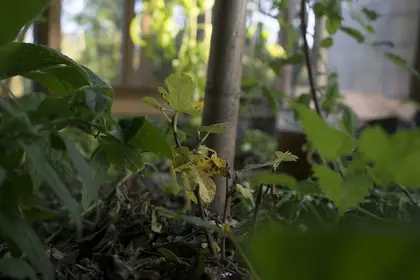
I enjoyed sitting in my swinging chair taking photos and videos of me in the chair. The atmosphere in the growing area during summer is simply amazing. You can’t compare it to a greenhouse or a house with a lot of windows. It is so different because of the soil.
When the hokkaido pumpkin made its way up to the 2nd floor and then grew to the outside and then down again. Pretty robust. That hokkaido was still growing when the garden got hit by frost.
Worst
The moment the IBC of the biogas plant collapsed. Had to go to Tampere to buy a water pump because neighbor’s didn’t work. I was kind of praying all the way “please don’t break”.
When I found that the concrete ring has sunk in on side due to the rain water just dripping down.
Change
Create one or more workshops around the biogas shed to get some more help with lifting of heavy stuff.
Lumia’s
Best
Making pancakes on biogas! Seeing how much Dominik has learned about construction and designing throughout the process. Generally I feel very proud and happy to have an innovative, refurbished structure that is useful to us in many ways on the premises – rather than having an unused shed sitting on a prime spot n our front yard or just buying some new, fancy, “ecologically built” construct and ripping the old shed down.
Worst
The process has been really long and has taken time from other things that might have in my mind been more important at times. The implementation has taken place in the years where I was very fed up with permaculture projects in general. I have felt angry having to help at times, and I have felt sad and ashamed for how little interest and support I have offered at other times. So quite a ride. And yes that collapsing IBS catastrophe where Nick stayed up till 1am pumping water and manure from the biogas plant! He smelled like manure for days!
Change
If I had had the interest and capacity at the time, I would have liked to participate more in the plan and build. Maybe I can remember this in the next big project.
Input vs. Output
Chris Evan’s once showed a time graph – it is a graph where the input gets lower over time and the output starts to get bigger. And I would say: I have crossed that line – the line where the output already is coming in – especially biogas, effluent, pumpkins, tomatoes, relaxation, fun, people, conversations, ideas, money, etc. And the input is more or less maintenance and some ideas for tweaking.
Tweak
I tweaked the initial grow area design while implementing it. When I bought trees for other zones I came across the fig and citrus tree that can withstand the Finnish climate here in the Finnish climate zone 2. They are winter hardy and as they are inside they should live through the winter. But that we will see in April 2021. I also tweaked the grow area in other aspects. I had to rescue a blueberry bush and a red currant. Both ended up in the grow area. The important parts, the pathway through it stays the same.
While hosting a biogas workshop I found that the area before the chicken coop is ideal to host about 8 people. That is enough for small 1-day courses, especially on a rainy day. I now have an area for storing folding chairs. I also integrated my vertical plotter. I can now draw 2x2 m maps, which is helpful when designing estates. One of the biogas bags is now hanging above the other bag, freeing space on the ground. Got that idea while cooking pancakes on biogas.
Accreditation criteria
I’m using the categories which I have used first in the designCamp design for the first time.
Demonstrating design skills
- SADIMET
- Ethics
- Principles
- Paste Sheet
- Zones
- Climate data
- Soil analysis
- PMI
- SWOC
- Bubble map
- Function, System, Elements
- Flow diagram
- Base map
- Locations of elements
- McHarg exclusion
- Helps & Limits (borrowed from Looby’s web)
- Action list / Implementation plan
- Maintenance plan
- Photos Series
Applying permaculture in my own life
Learning from and developing your permaculture practice
This design was from an implementation point of view about patients and slow and small solutions. Taking small steps to get things done, breaking the design down to digestible parts. What I learned is: There is no perfect design. Never. A more experienced designer will always be able to put something else in, interpret observation and data differently. But there are good tools around that can help you to get a design that is save enough to try. Using the tools more often helps me a lot. Making the choices ethical ones, earth care, people care, the limit of resources, always helps with the outcome.
I made a two videos using semi-professional equipment. It is good to learn the usage of video tools and use them more often. This time I also included some footage from the drone. Flying the drone wasn’t that easy in beginning. I had to learn and experiment. Generally video production consumes a lot of time but and energy but makes the documentation more tangible.
It is for the first time I used the McHarg exclusion. I actually read Ian McHarg’s book “Design with nature” to get a better understanding of his method before using it.
Since I did all the building upgrades by myself I now have a better understanding of static and wooden buildings.
Applying permaculture to my work and projects
Within Holmgren’s domain this is in “Building” and in “Tools and Technology”. Retrofitting can be a lot of fun but also a lot of pain. It really depends on the design. Clever design plays to my (and my customers) needs.
I feel very comfortable with first looking for used materials before going to the shop. This is something I have already implemented in other designs.
To sum it up: I think I have taken a lot of knowledge from this design with me into other projects already.


