At Beyond Buckthorns we have our own well. It is 12 – 13 meters deep and is connected to a pump that starts when there is demand. Well water is our drinking and washing water. In 2017 we got hit by 2 droughts. Both together made it necessary to use well water to water the garden. Our main garden is 300 m² in size. And with a drought lasting 3-4 weeks we reached our limit – then the well started to run dry. It was then when I started to design a simple water plan for the garden.
Scope
Earth care by making sure that we don’t need well water for the garden. Store energy higher up in the landscape and make it available when needed.
People care by making sure that Lumia, my wife, doesn’t have to worry about water scarcity. Be more resilient when it comes to water.
Fair share by making my design available online
I’m using SADIMET as a design process
Survey
Observations
- It all started with a drought in 2017 – no rain for weeks multiple times a year
- Then even ground water scarcity hit
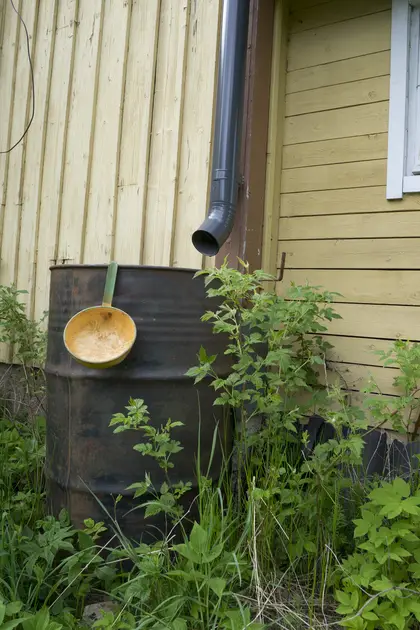
- Rain water is only collected in some old rusty barrels
- There is a lot of roof surface available and unused
- The roofs are in different zones at different altitude
- The zone 1 around the house is mainly rock – no digging
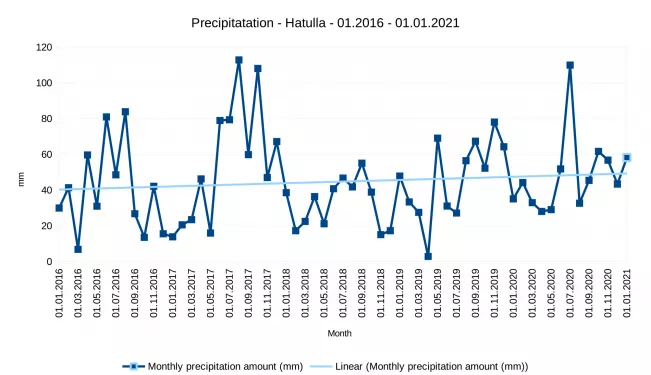
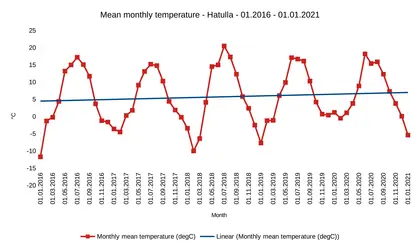
- Local climate data is available
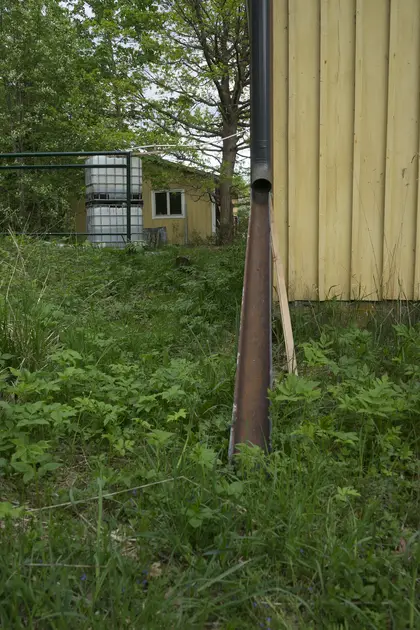
- Some roofs have already a gutter and different run-off points
- Garden is about 300 m² and needs to be watered every 3rd day if no rain happens
- The garden is on a slope with some trees and manly bushes at the lower end
- Personal preference: watering can over hose
- Leafs block the gutter
Climate data
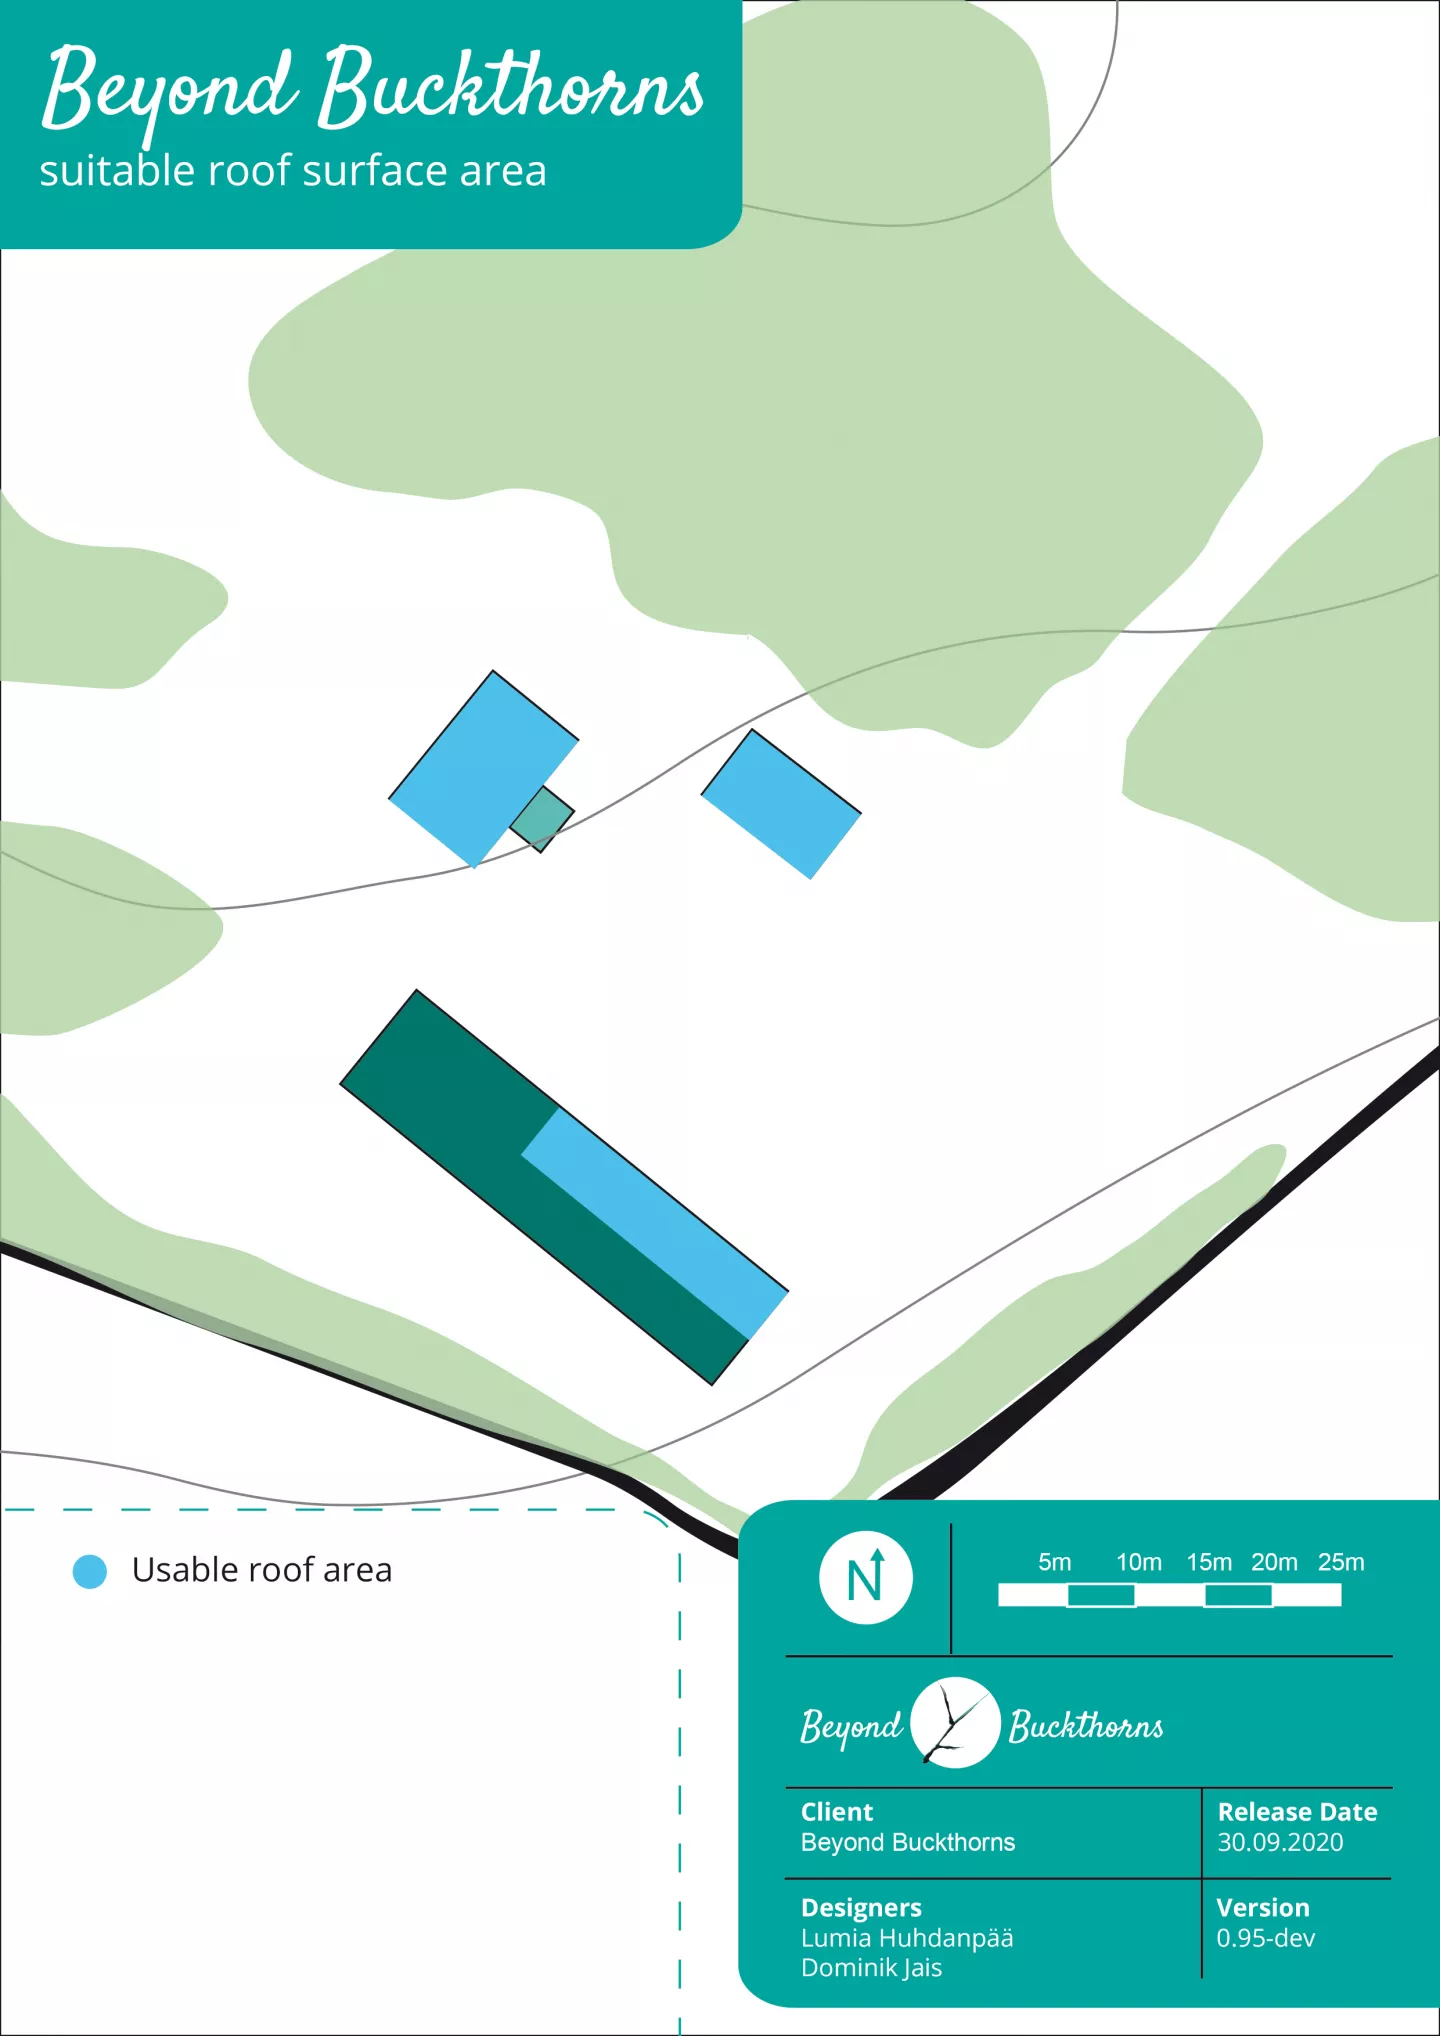
Roofs
For the big building I only showed half of the roof area – only one side. The other side should run off into the food forest. Giving it excess of water.
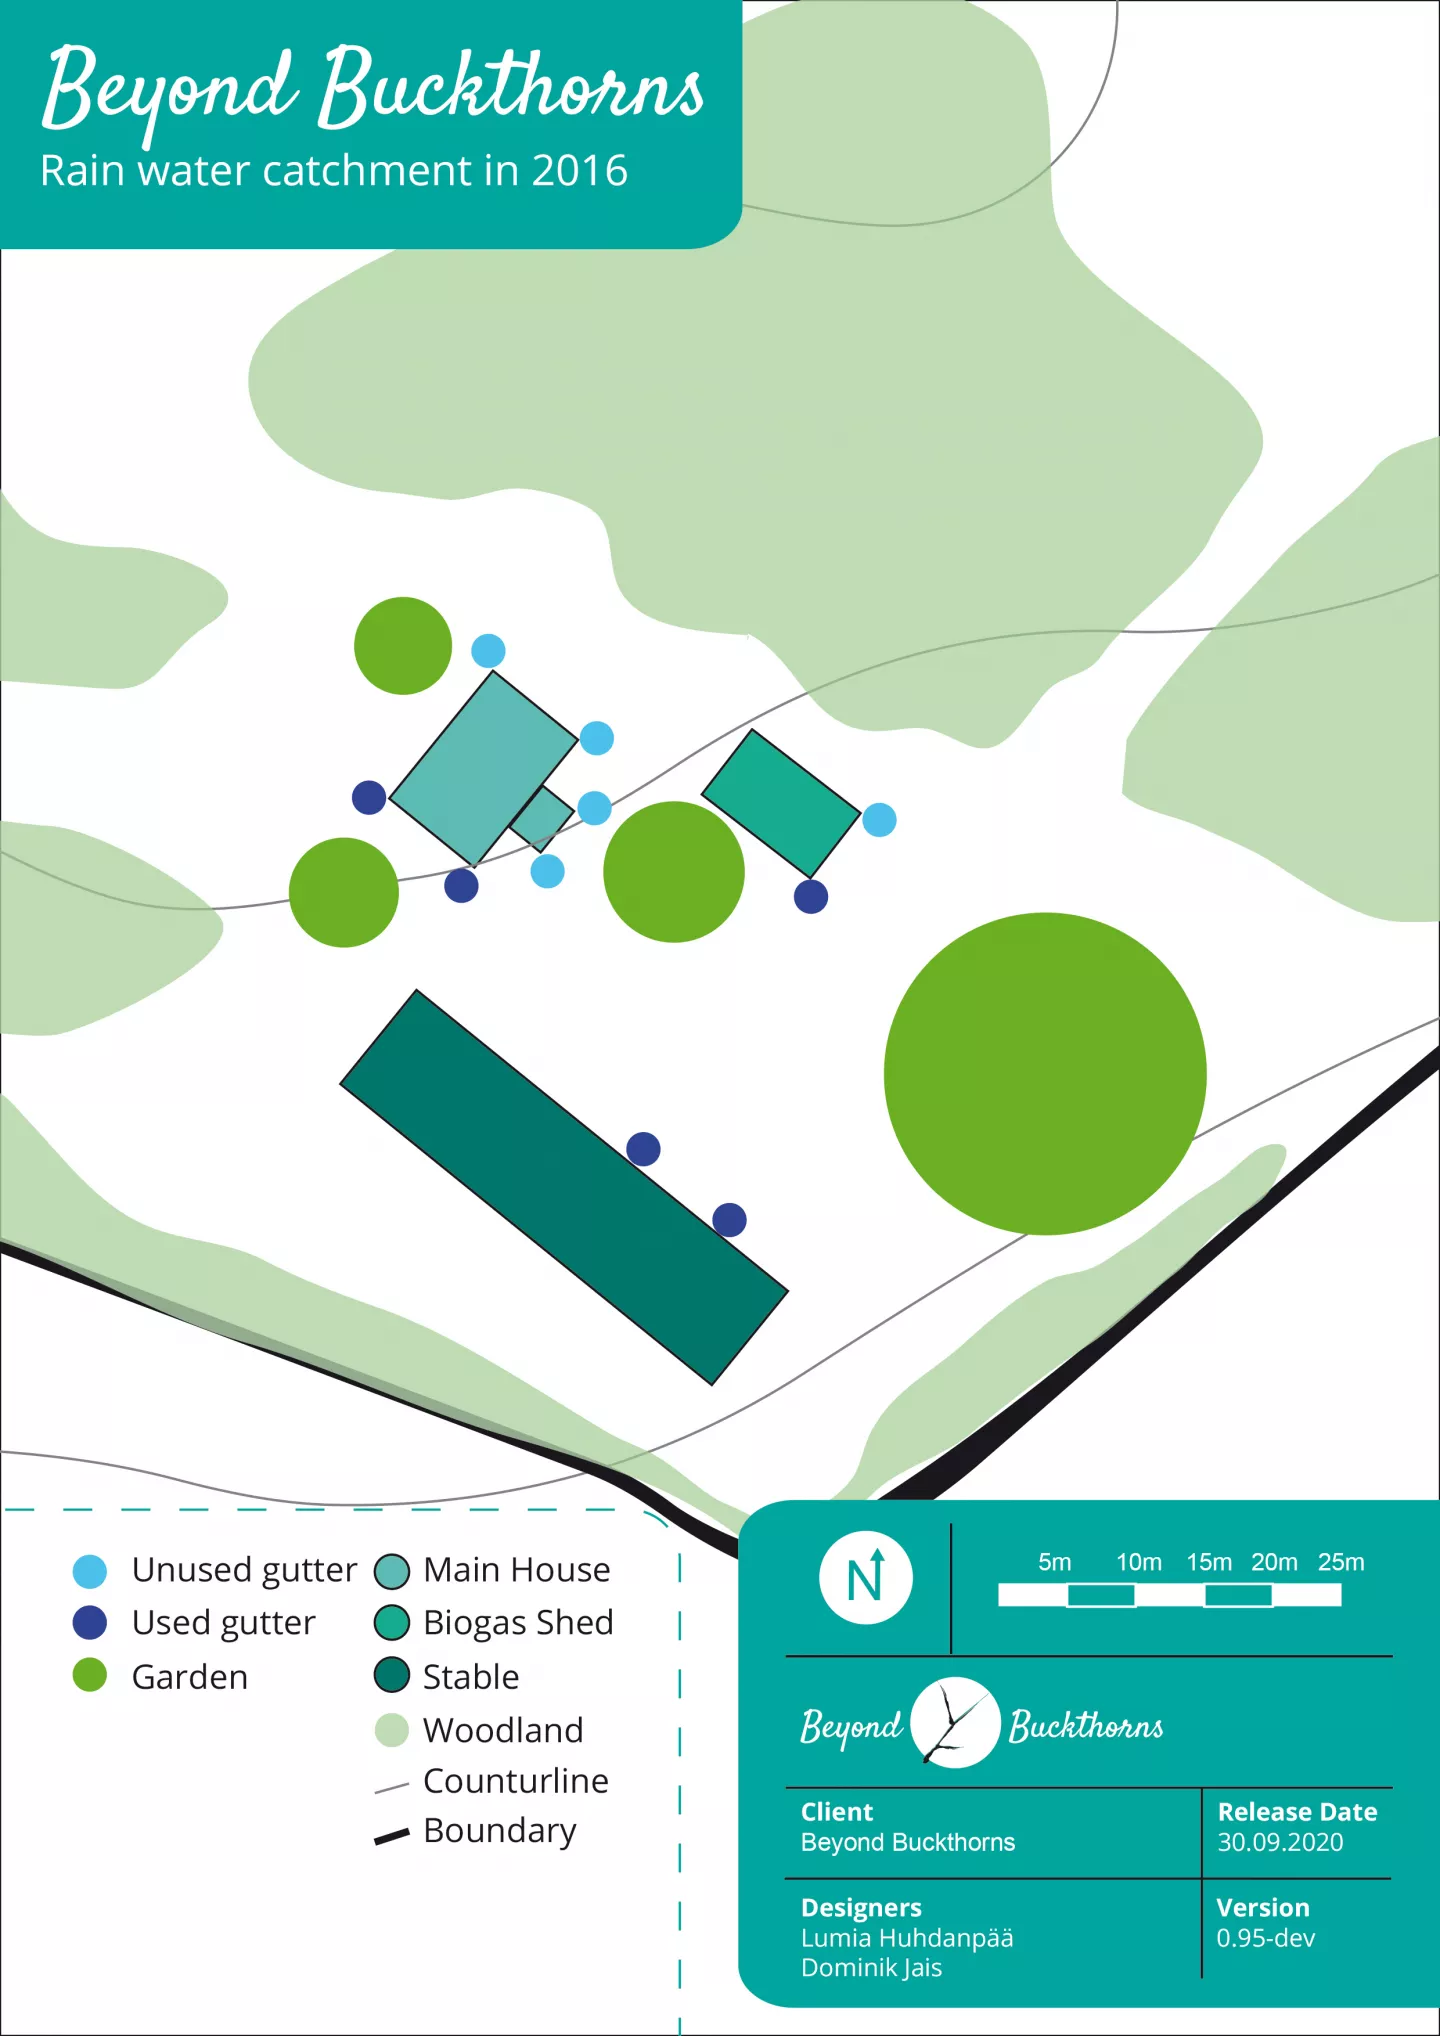
Base map
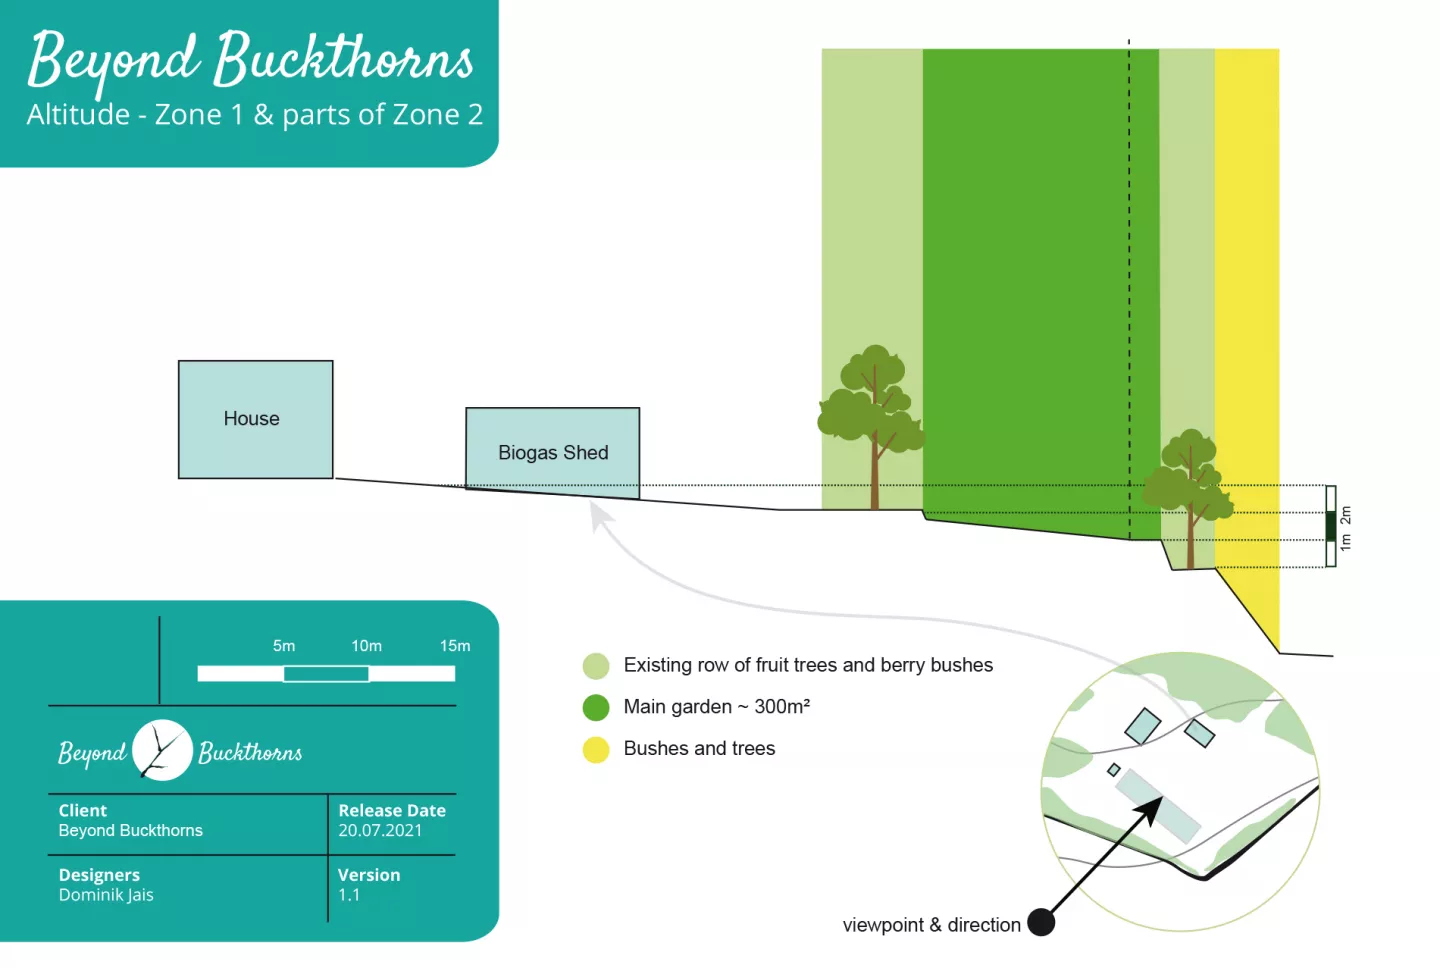
What’s from the base map missing is the altitude. Therefore I created a side profile showing the difference in height from the house to the garden.
All used and unused run-off points are above the main garden (biggest dot), which makes it possible to use gravity for transportation. All other gardens are in a good relative location to a run-off point.
Budget
Since there are many things simultaneously happening at Beyond Buckthorns I can’t spent a lot of money for this. I’ll put the budget at 300,- € with an extension of another 300,- if necessary.
Analysis
Need
Lumia told me that during the growing season she uses up to 100 liters ever second day for the main garden if there is no rain. The main garden is usually mulched. A drought can last up 4 weeks or even longer. That gives 4x7/2 x 100 liter = 1400 liters. But then there is the green house of 16m² and and indoor multi layer garden of 20m². In both indoor growing areas we grow tomatoes. The indoor growing area was established in 2020 and therefore water consumption is unclear. The need is to be more resilient
Rain water collection possibilities
| Possible Collection volume | |||
| Roof area | m | m | m² |
| Red building (only one side) | 26 | 4,25 | 110,5 |
| Biogas Shed | 10 | 6,5 | 65 |
| Main house | 12 | 10 | 120 |
| Total roof area | 295,5 | ||
| Monthly average precipitation | 50 | liter/m² | |
| Total amount of volume per total roof area | 14775 | liter | |
| 14,78 | m³/month | ||
| Current Collection volume | |||
| Barrels Volume | Amount | Liter total | |
| 200 | 4 | 800 | |
As you can see I should be able to collect ~ 15m³ / month. Which is more than enough for the garden and the greenhouse.
In order to see what might be a good starting point I evaluated the different gutters / run-off points.
| Gutter | Plus | Minus | Interesting |
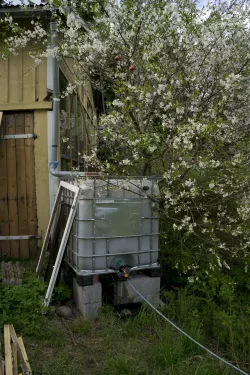
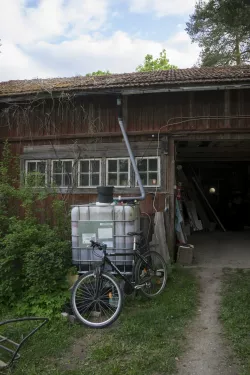
| existing gutter above garage | is above the garden, easy to use hose to the garden | partially rusty | high enough for 2 IBCs stacked |
| metal collecting barrel is rusting and leaking | |||
| existing gutter on the front of the biogas shed | exists | is leaking | high enough for 2 IBCs stacked |
| is above the garden, easy to use hose to the garden | metal collecting barrel is rusting and leaking | ||
| door to the biogas shed is close to the run-off point | made of 3 parts | ||
| existing gutter on the backside of the biogas shed | heavy leaking | high enough for 2 IBCs stacked | |
| no collection at the run-off point | |||
| the water just dripping down is causing the concrete structure to deteriorate | |||
| new gutters on the main house | collection works very well | metal, more difficult to cut than plastic | high enough for 2 IBCs stacked |
| no leakage | access point is far too low, just allows a bucket or a barrel below | ||
| 6 of them available to tap into, 2 in the back, 4 in the front | |||
| some small gutters above entrances | unusable | high enough for 3 IBCs stacked | |
PMI
| Container | Plus | Minus | Interesting |
| Metal | Natural material | Rust | |
| Leakage | |||
| difficult to connect with others | |||
| not stackable | |||
| 50 – 200 liter plastic barrel | Lasts forever | not stackable | different versions around |
| can be connected | plastic | ||
| available used | |||
| IBC | can be connected | plastic | Different versions around |
| lots of connectors available | difficult to carry around | ||
| stackable | |||
| extremely sturdy due to metal cage | |||
| ubiquitously available | |||
| available used |
I opt for IBCs as they have more plus than the other and are a far batter value if plus is compared to minus.
Let’s divide between opportunities and challenges:
| Opportunities | Challenges |
| existing gutter above garage | existing gutter on the backside of the biogas shed |
| new gutters on the main house | some small gutters above entrances |
| existing gutter on the front of the biogas shed |
Design
In the survey and analysis I already worked towards using the gutters to catch rain water. In the design I’m going to see where I can best place the storage containers so that the stored water can be used.
Placement map
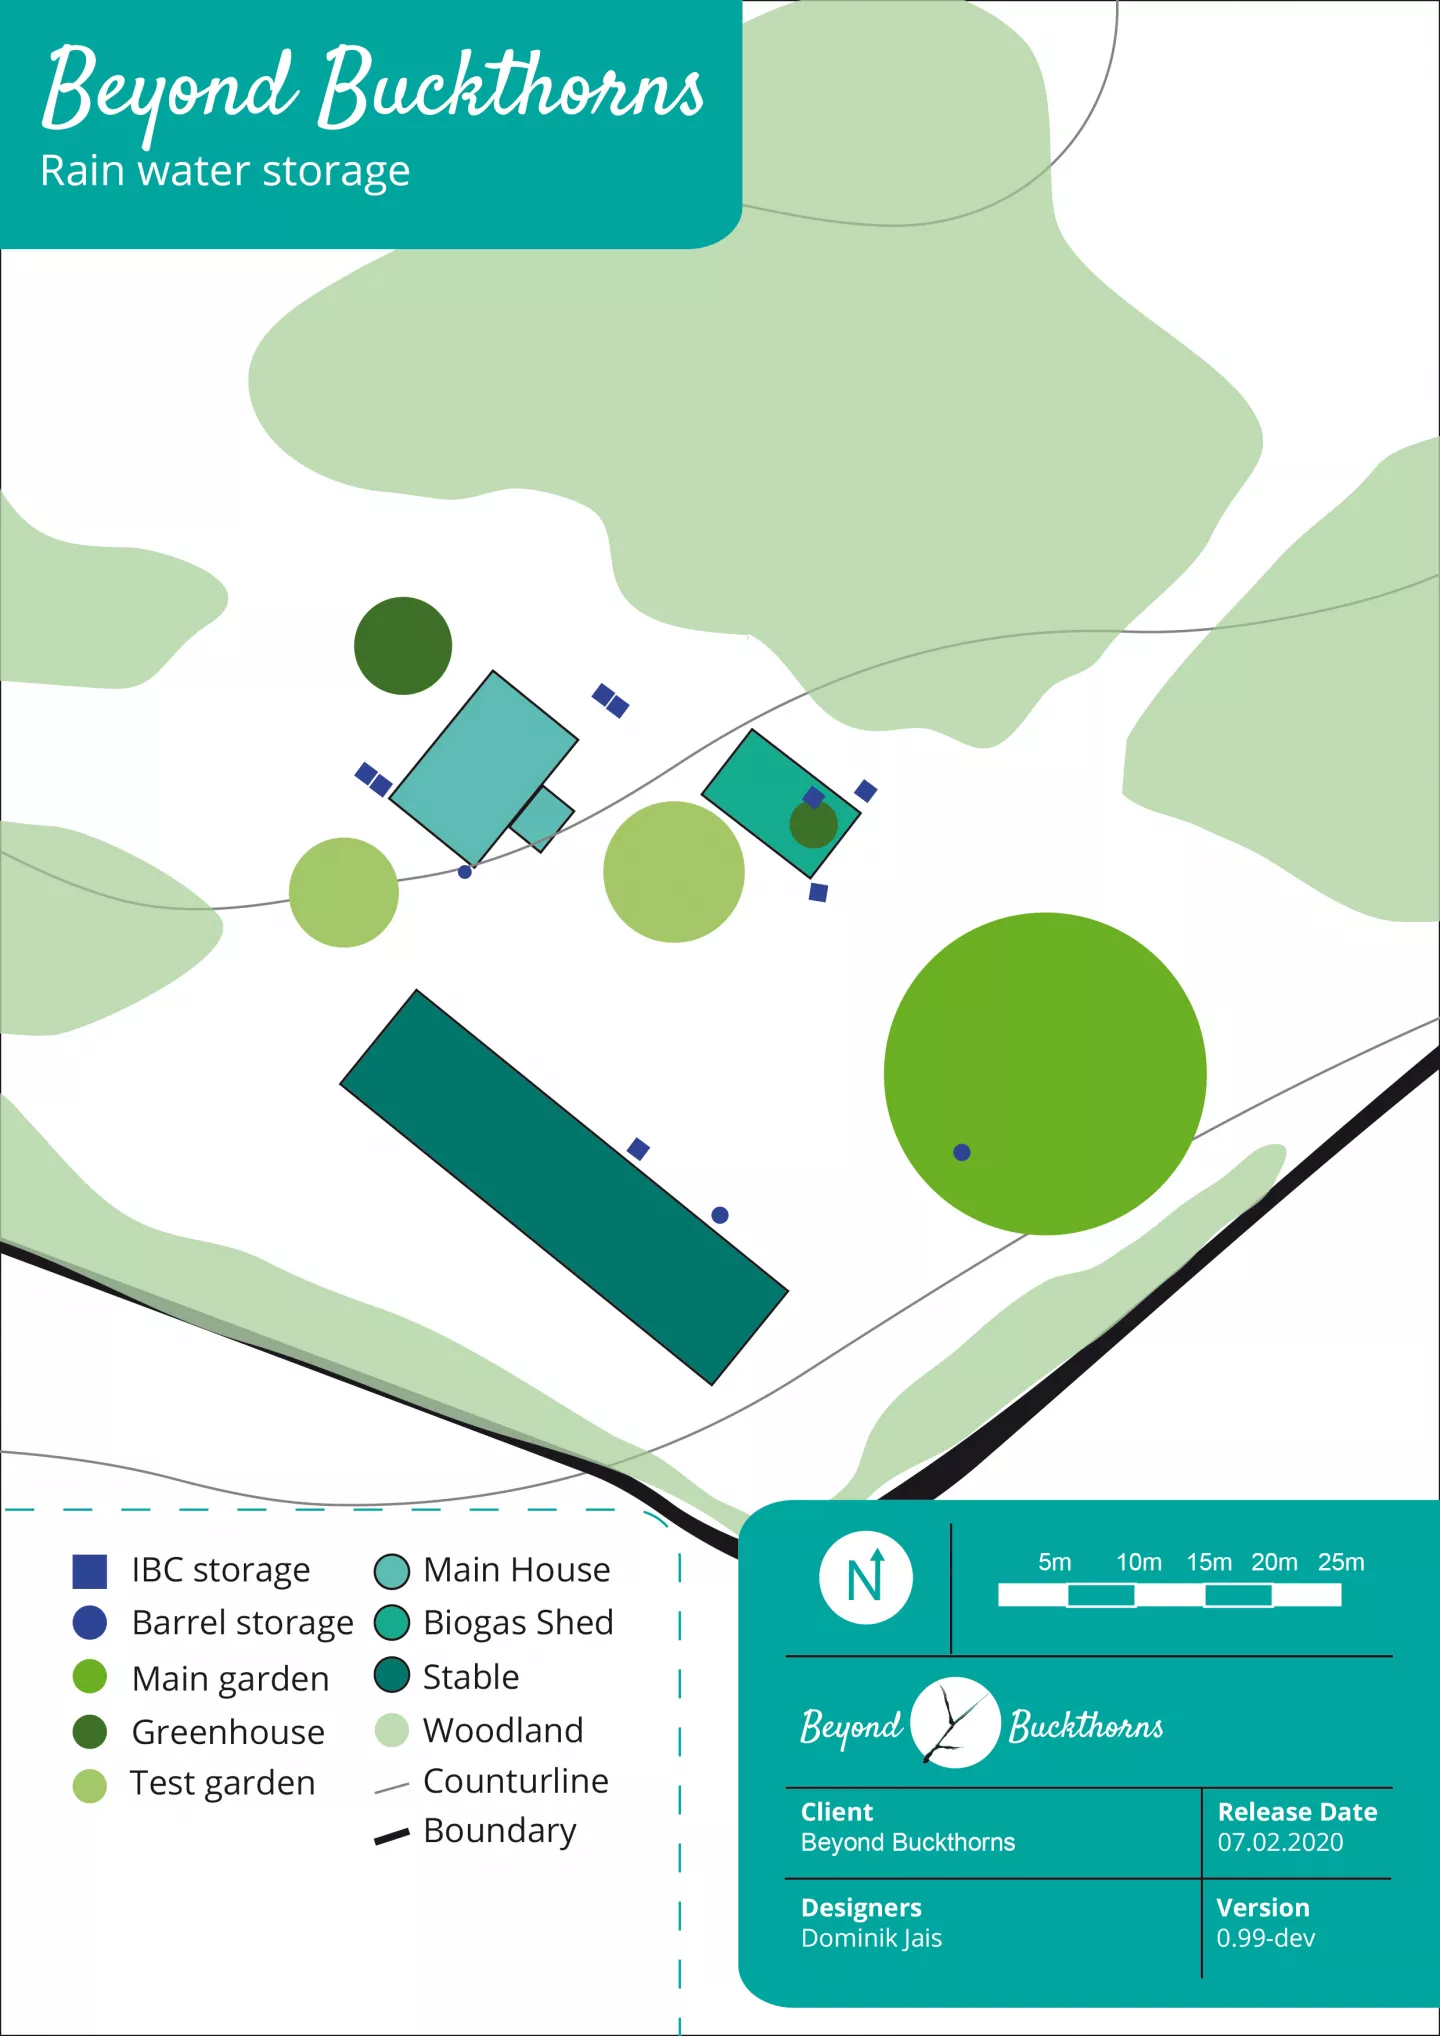
From the base map we know the possible run-off points. It is now time to decide which ones are useful and which are not.
- Behind the house, because there is a greenhouse and we need water in a good relative location.
- In front of the house on the side for the experimental garden in front of the biogas shed. This is also for the small plant nursery.
- In the front of the house on the side so that the water doesn’t go into the ground unused
- Behind the biogas shed as an emergency water reservoir. The water is used to store biogas and also filter CO2 out of it.
- Inside the biogas shed per design of the biogas shed → to water the indoor food forest
- In front of the biogas shed for the experimental garden and the main garden
- Besides the garage for the main garden
With that many different locations of water collection I have fulfilled the “multiple elements for important functions” principle. All the elements are in a good relative location to the different gardens.
Stacking
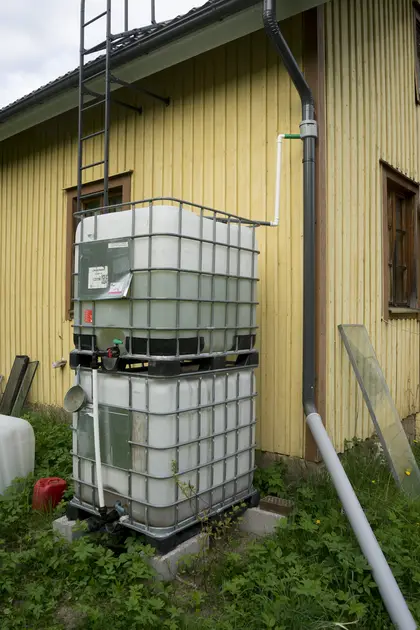
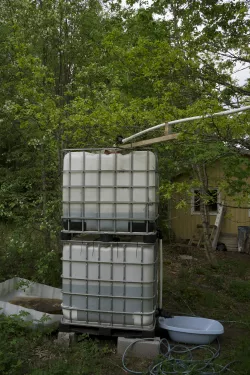
With 2 IBCs stacked above each other we can create pressure on the water column. Every m in altitude is 0,1 bar in pressure. That gives us an advantage in water transportation. The higher we can store the water the more work it can do.
Stacking IBCs for rain water storage is in my mind a good example on how to catch and store energy.
Amount of stored watering
With the chosen locations the installed amount of water storage will be the following:
| m³ | where |
| 2x1 | Stacked behind the house |
| 2x1 | Stacked front side of the house |
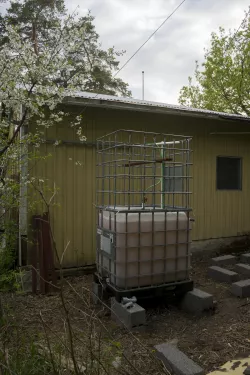
| 1 | back of the biogas shed |
| 1 | in front of the biogas shed |
| 1 | inside the biogas shed |
| 1 | besides the garage |
| 2x0,2 | Besides the house and in the main garden |
| 8,4 | total |
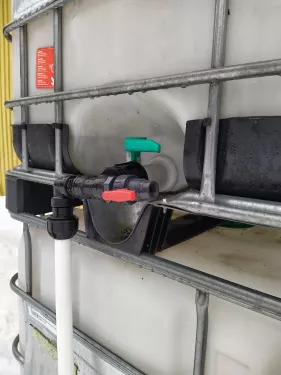
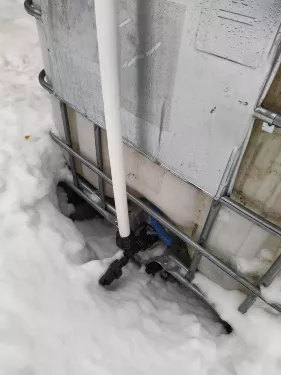
With the placement and the amount set it is now about the details. Design from pattern to details. The unstacked IBCs can be still stacked. According to the IBC manufacturer actually 3 IBCs can be stacked above each other. That would give even more pressure but is also a little difficult to achieve and also the most roofs are not high enough to allow a filling of the IBC with gravity.
Leaf removal
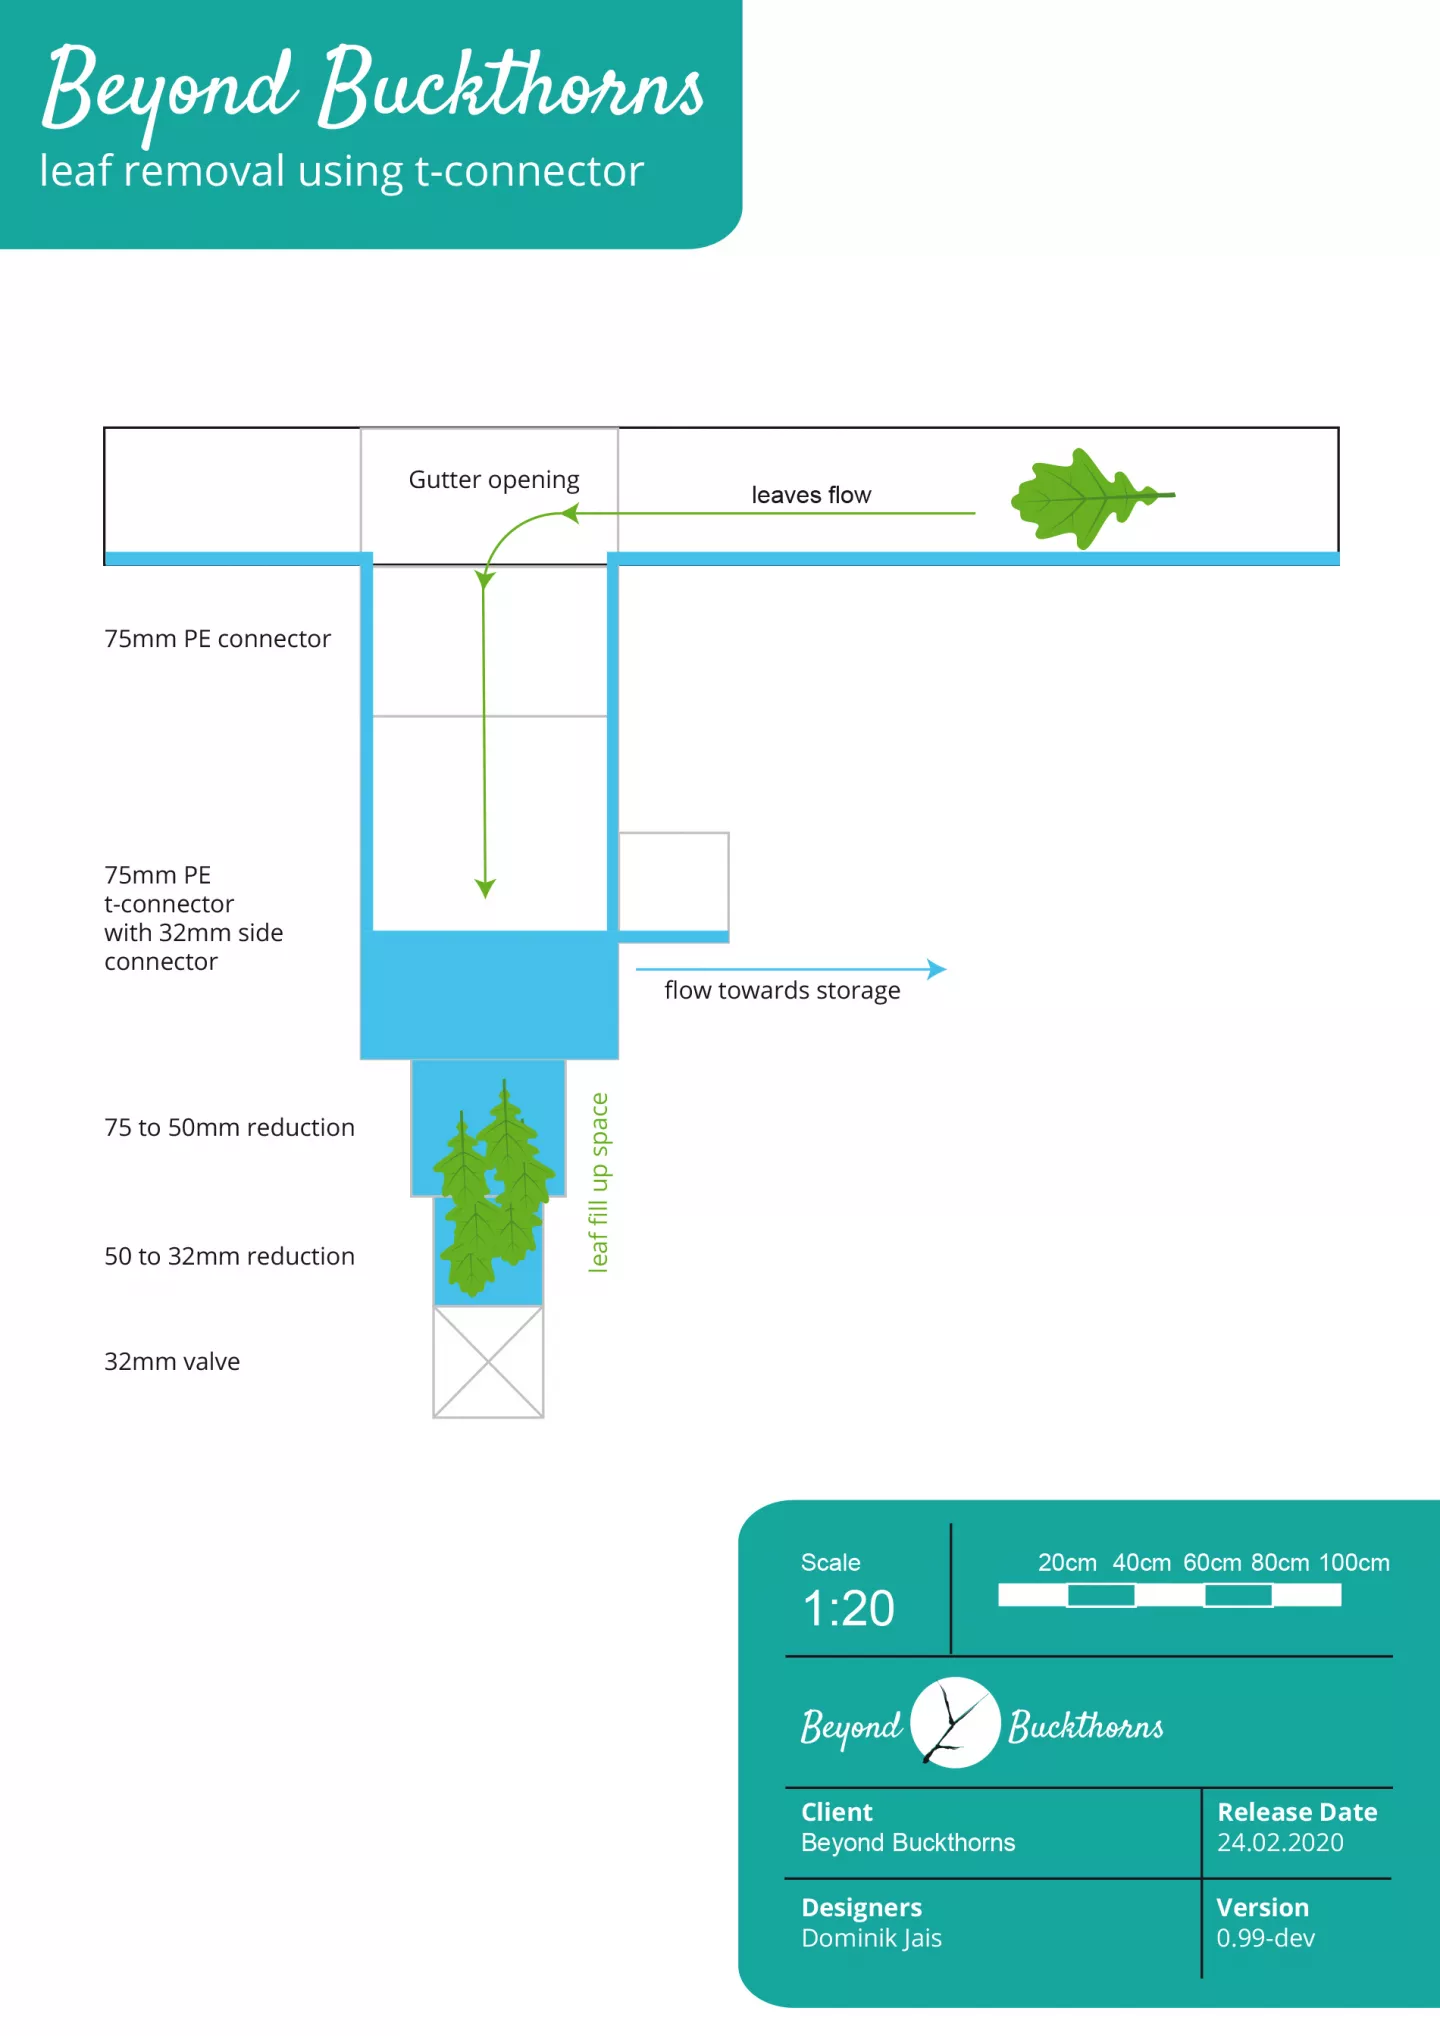
One of the bigger problems is the clogging of gutters and consequently pipes due to leaves. While it is less of a problem for the gutter on the house or on the stable the biogas shed gutter is heavily affected. Besides the biogas shed is a big oak. I checked the gutter often an there are so any leaves that leaf removal is inevitable.
Some time ago I saw a simple leaf removal system. It is a t-pipe connected to the run-off pipe from the gutter. At the end of the lower t-pipe connector there is some additional ~ 50 cm of pipe. This additional pipe fills up with water until the t-pipe is reached and then it goes sideways. Since the leaves are heavier they will fall into the additional pipe and sink to the bottom.
This is easy to build and I will test this on the backside of the biogas shed before I install it on the other parts where it is necessary.
Implementation
| Implementation list | Persons needed |
| Buy 5 used IBCs (3 for biogas – different project) | 1 |
| Buy connectors for 2 IBCs | 1 |
| Buy gutter & hoses | 1 |
| If no stones available buy stones | 1 |
| Buy PE pipes and connectors for 2 not stacked IBCs | 1 |
| Upgrade gutter & fix if possible | 1 |
| Level base where IBCs will be put | 1 |
| Put stones in | 1 |
| Put IBC on top of stones | 2 |
| Connect gutter with IBC | 1 |
| Build leave removal test | 1 |
| Buy 4 used IBCs | 1 |
| If no stones available buy stones | 1 |
| Buy connectors for 2 IBCs | 1 |
| Buy connectors for existing gutter | 1 |
| Buy PE pipes and connectors for 2x2 stacked IBCs | 1 |
| Level base where IBCs will be put | 1 |
| Put stones in | 1 |
| Put IBC on top of stones | 2 |
| Put 2nd IBC on top of 1st | 3 |
| Connect gutter with IBC | 1 |
| Plant ranking plants besides IBC | 1 |
| If leave removal test worked build it 3 times | 1 |
All this things got done from 2017 to 2021. One after another. Slow and small solutions.
Maintenance
The plan below is part of the bigger Beyond Buckthorns maintenance plan:
| Maintenance plan for water storage | ||||||||||||
| Jan | Feb | Mar | Apr | May | Jun | Jul | Aug | Sep | Oct | Nov | Dec | |
| Check gutters and clean them | x | |||||||||||
| Set to collect water | x | |||||||||||
| Attach hoses | x | |||||||||||
| Set to not collect water | x | |||||||||||
| Empty the IBCs half | x | |||||||||||
| Remove all the hoses and empty them | x | |||||||||||
| Disconnect metal parts | x | |||||||||||
| Empty all barrels | x |
[UPDATE] The hoses need to be emptied to prevent ice breaking. The IBC can stay half empty since the ice will not break them when half full. The collectors need to be moved to not collect in winter since otherwise if snow is melting they fill the IBC which would cause ice breaking if the temperature drops again after melting. [/UPDATE]
Evaluation
Leaf removal
Guys, the leaf removal didn’t work. After some heavy rains I noticed that my IBC in the biogas shed wasn’t filling up. So I climbed on the ladder and found something was stuck in the pipe.
I opened up the pipe from below as I would when removing the leaves. Nothing came out. I pushed from above with a stick and then suddenly something big popped onto the ground. It was a dead stinky squirrel heavily soaked with water. I nearly had to vomit. Poor creature. I took it to the forest and put it on a stone. One day later it was gone.
Let’s hear what Lumia, Beyond Buckthorns main gardener, has to say:
Feedback from Lumia
Best
I don’t have to worry about water anymore! At least almost never. I am the person responsible for the main garden so the water issue is very important to me. There is almost always a dry period in May, when all the new planted and sown plants need tender care and daily watering. It was impossible to do with the old barrels. Now with the IBCs I can gather the snow melting water and have many cubics of water when the dry period hits. It’s just brilliant and gives us a lot of security.
Worst
The poor squirrel! But honestly, I don’t know. Maybe the IBC landscape is not the prettiest. I am sure we can plant (and Nick already has) some vines around them?
Change
The water collection is still pretty far from the main garden. I transport the water with hoses and fill the watering cans near the main garden, which works ok, but is rather slow and hence time-consuming. I am sure we will find some suitable tweaks, though.
Stacked IBCs
While one stacked IBC worked like charm the other didn't. I had forgotten to put a hole into the lower one so that air could get out. Yeah, physics. But once that was repaired it also worked very well. It is actually possible to build a decent amount of pressure.
Hoses for transport
Since there is about 1 – 3 meters in altitude difference between some of the IBCs it is possible to pipe water from one to the other using just gravity. I really liked that one.
Trees
Not all of my grafting worked. Only 1/3 established a connection. I have to graft again in 2021 and then see how it goes. The metal wire cage for keeping the rabbits out worked so far.
Design Process
SADIMET is a simple enough process. For me it doesn’t really matter if its OBREDIMET or SADIMET. I feel that SADIMET is quicker while OBREDIMET’s emphasis is to work more thoughtful. For this design it was a good choice. It was quick and straight forward.
Tools used
When working with the expectancy of others I could have used a client interview or PASTE sheet. Since it was more or less communicating my plans with my wife and listen to her I dropped both tools as they both would have been too much overhead for this design. There was clarity from the beginning.
It was nice to pull climate data from public data and put them into a spreadsheet to create diagrams. It is nice that there is now a lot of OpenData around that can be used for free (at least in Finland).
I think it is really important to get a proper base map done right from the beginning. It makes placement maps possible and the whole workflow much easier.
Action list and maintenance plan are helpful tools. Without a action list (Kanban tasks) I would have been lost. The maintenance plan is for 2021. I can’t tell how helpful it is.
Effectiveness
Coming back to what I wrote in the beginning in the scope.
Earth care: The implemented design makes sure that there is enough water higher up in the landscape to be used. There was never any shortage of water so far. We even have an excess amount which stays in the IBC, freezes over winter, and is then in spring available. It was much less effort than digging a pound would have been. Even during droughts our plants are doing well. We take good care of them.
People care: What I got from Lumia is that she is very happy with the current situation. She asked me for some tweaks which I will implement in 2021. We are more resilient when it comes to water. I also enjoy the simplicity of it. Hooking up a hose – water march!
Fair share: Having designs online instead of packed away benefits the general public. Cathrine asked me if she could share this design with her other diploma apprentices. For me this is a great honor and I think my underlying concept for the diploma, writing it online, is generally helping.
Tweaks
The most interesting tweak I did was for the leave removal. I created simple but sophisticated system using 3d printing. I will write about it in another design. (Otherwise I would have a design in a design). Since the new leave removal system worked pretty well I’m going to role it out for all systems in 2021.
While I put comfrey and raspberries to the trees I didn’t plant any bushes. So the first tweak in 2021 for the tree row will be adding berry bushes and perhaps some climbers.
The outlet piping between the different IBCs changed during implementation. The stacked IBCs have the far better connection. I will upgrade the others in 2021.
Accreditation criteria
Demonstrating design skills
- SADIMET
- Ethics
- Principles
- Paste Sheet
- Climate data
- PMI
- Base map
- Placement map
- Action list / Implementation plan
- Maintenance plan
Applying permaculture in my own life
It is sometimes the small stuff what brings the biggest change. I was really happy when Lumia saw the water storage in place and wasn’t afraid of water scarcity any more. It kind of felt happy.
Figuring out the different connectors, the pros and cons (that would be another DIN A4 PMI) of them was time consuming but worth it. I avoided a lot of mistakes getting the right supplies. But it required reading through a lot of websites.
While the design seems to be rather small the impact is pretty big. Not being able to water the garden and either losing the whole crops or running put of well water would be really devastating. I couldn’t really imagine that – and the impact it would have. Choosing designs that give security for my and my family's life feels like the right choice. It’s more or less about the prime directive of permaculture – taking responsibility for ones own life and that of ones family.
Learning from and developing your permaculture practice
This design was from an implementation point of view another slow and small solutions. Taking small steps to get things done, breaking the design down to digestible parts. What I learned from this design: you can kill animals with your design. It was a shock for me. I had a hard time for two weeks.
Since I did all the building upgrades by myself I now have a better understanding of piping, the different connectors available and all the parts necessary for piping water. I know where I get which parts.
What I really liked was getting the altitude profile done. I’m not going into details but I think I have a system that works pretty well. It needs some more tweaking but I don’t need it to be accurate down to cm, half a meter to a meter is enough. That makes a huge difference, especially since most of the Finnish maps are only precise to 2 members altitude.
Applying permaculture to my work and projects
Within Holmgren’s domain this is in “Tools and Technology”.
Water is just physics and fluid dynamics. The difference makes a good analysis, and a good relative location. And of course multiple elements for important functions. Catching & store energy (potential). It’s about natural, renewable resources, its integration not segregation, looking first into the larger picture and then into the details. It’s about diversity, and the marginal. It’s about the principles that I use, or as Prof. Snape from Harry Potter would say it: “Always”.


